> ## Documentation Index
> Fetch the complete documentation index at: https://mintlify-mintlify-add-hello-world-quickstart-48843.mintlify.site/llms.txt
> Use this file to discover all available pages before exploring further.

# 快速入门

> 在几分钟内部署文档

本快速入门指南将演示如何在几分钟内设置并部署你的文档站点。

完成本指南后，你将拥有一个已上线的文档站点，可随时进行自定义与扩展。

<Info>
  **准备工作**：开始之前，请先[创建账号](https://mintlify.com/start)并完成引导设置。
</Info>

<div id="getting-started">
  ## 入门
</div>

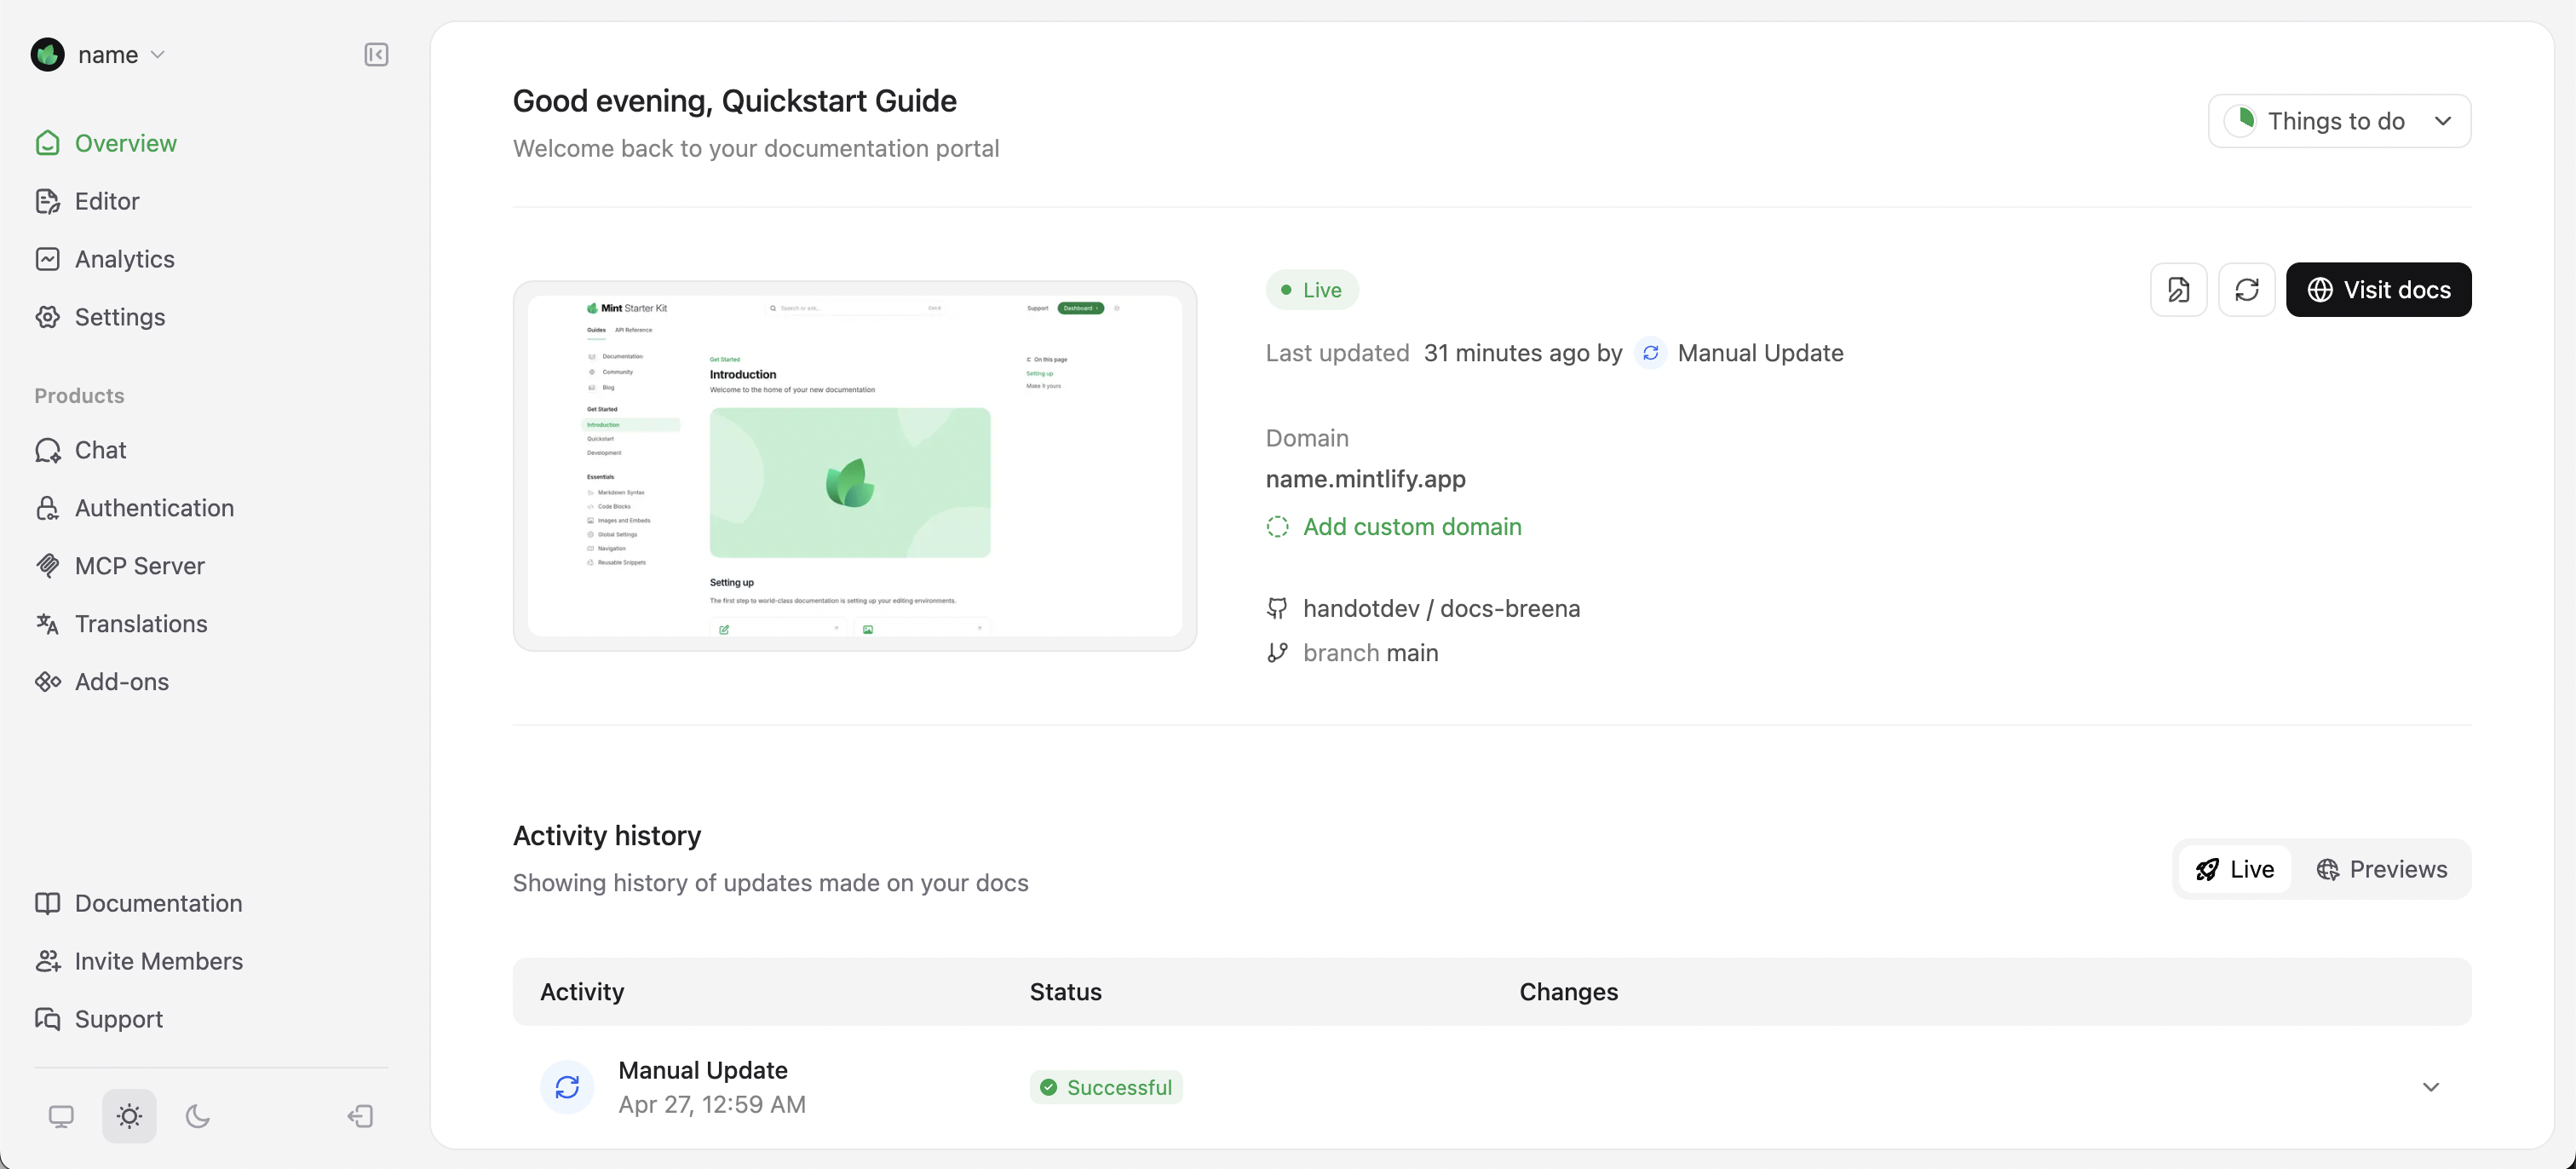
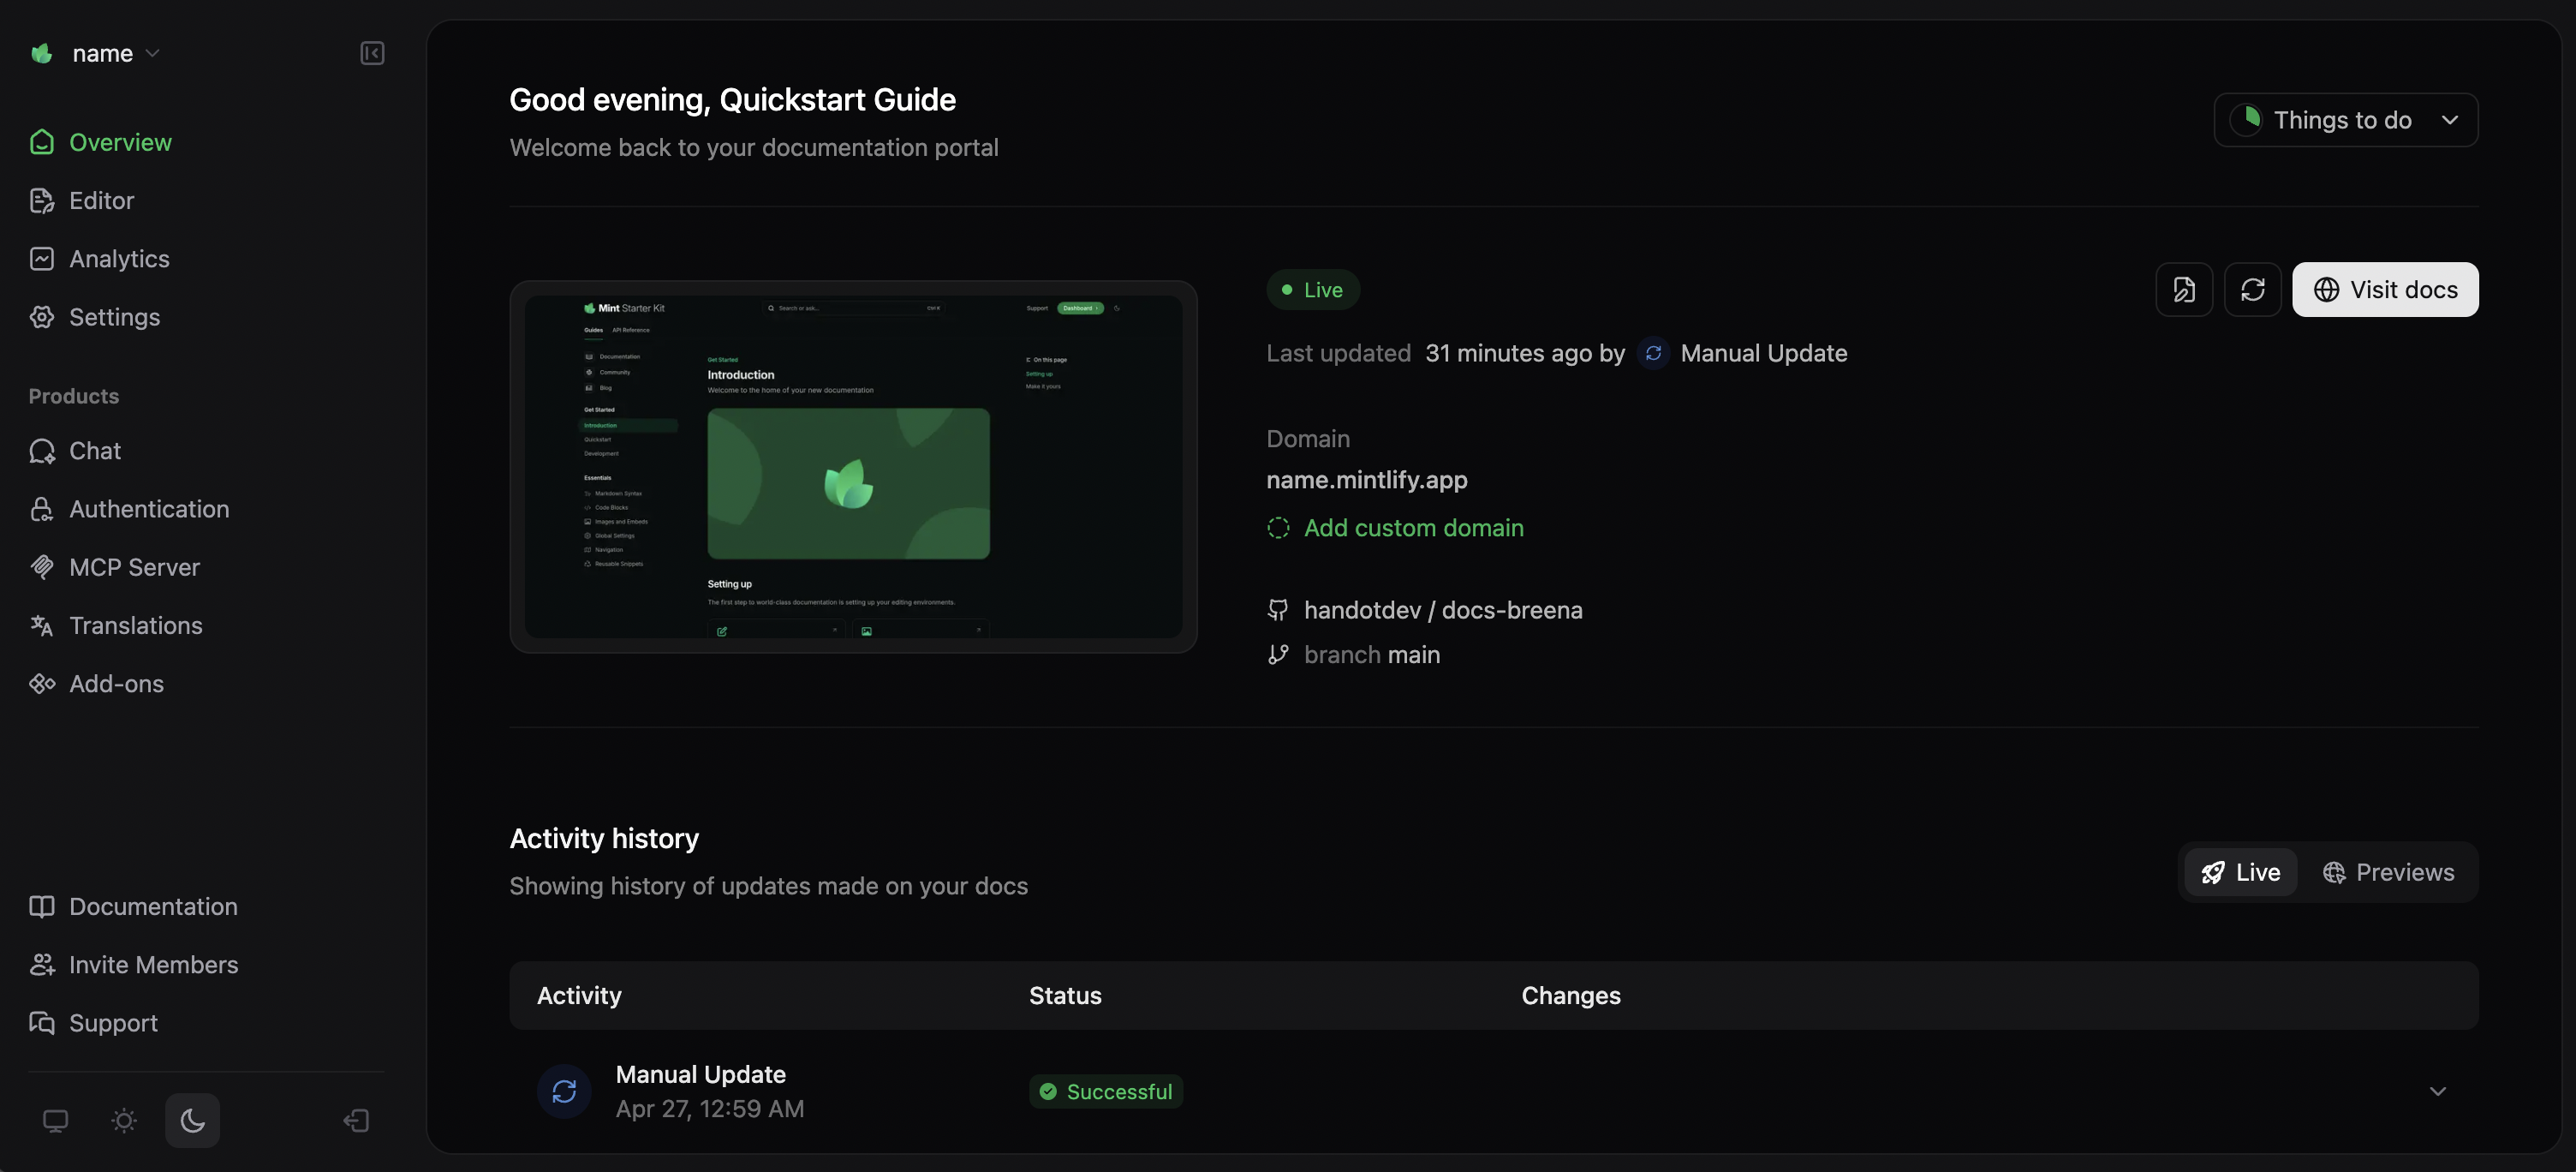
完成初始设置后，你的文档站点会自动部署到一个唯一的 URL，格式如下：

```
https://<your-project-name>.mintlify.app
```

在你的[控制台](https://dashboard.mintlify.com/)的“概览”页面查找你的 URL。

<Frame>
  <img src="https://mintcdn.com/mintlify-mintlify-add-hello-world-quickstart-48843/jocJo5b89LRoeOR4/images/quickstart/mintlify-domain-light.png?fit=max&auto=format&n=jocJo5b89LRoeOR4&q=85&s=30a8153224da6651818f304ee28de6d3" alt="Mintlify Domain" className="block dark:hidden" width="3024" height="1372" data-path="images/quickstart/mintlify-domain-light.png" />

  <img src="https://mintcdn.com/mintlify-mintlify-add-hello-world-quickstart-48843/jocJo5b89LRoeOR4/images/quickstart/mintlify-domain-dark.png?fit=max&auto=format&n=jocJo5b89LRoeOR4&q=85&s=7ea305db69c4e50c1433dc58e89b54f3" alt="Mintlify Domain" className="hidden dark:block" width="3008" height="1368" data-path="images/quickstart/mintlify-domain-dark.png" />
</Frame>

你的网站 URL 会立即生成。设置文档站点期间，可使用该 URL 进行测试并与团队分享。

<div id="install-the-github-app">
  ### 安装 GitHub 应用
</div>

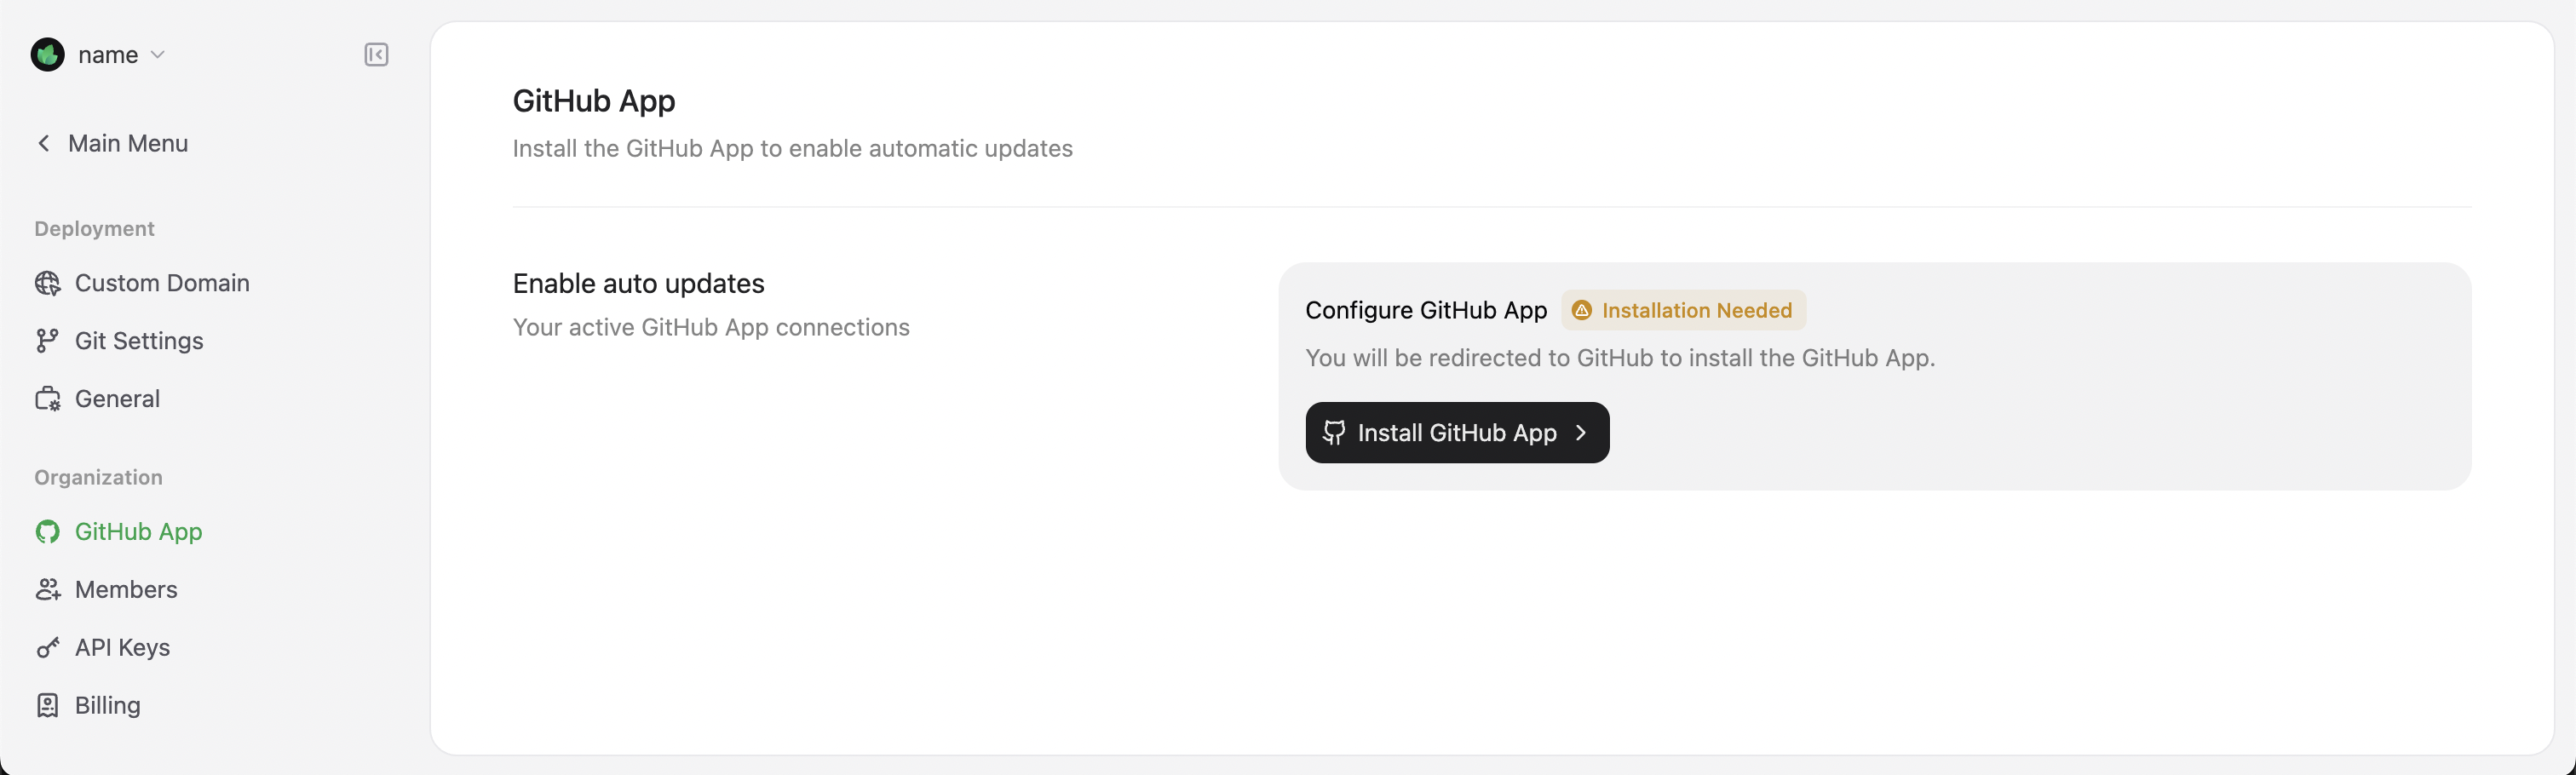
Mintlify 提供了一个 GitHub 应用，可在你将更改推送到仓库时自动进行部署。

按照入门清单或控制台中的指引安装 GitHub 应用。

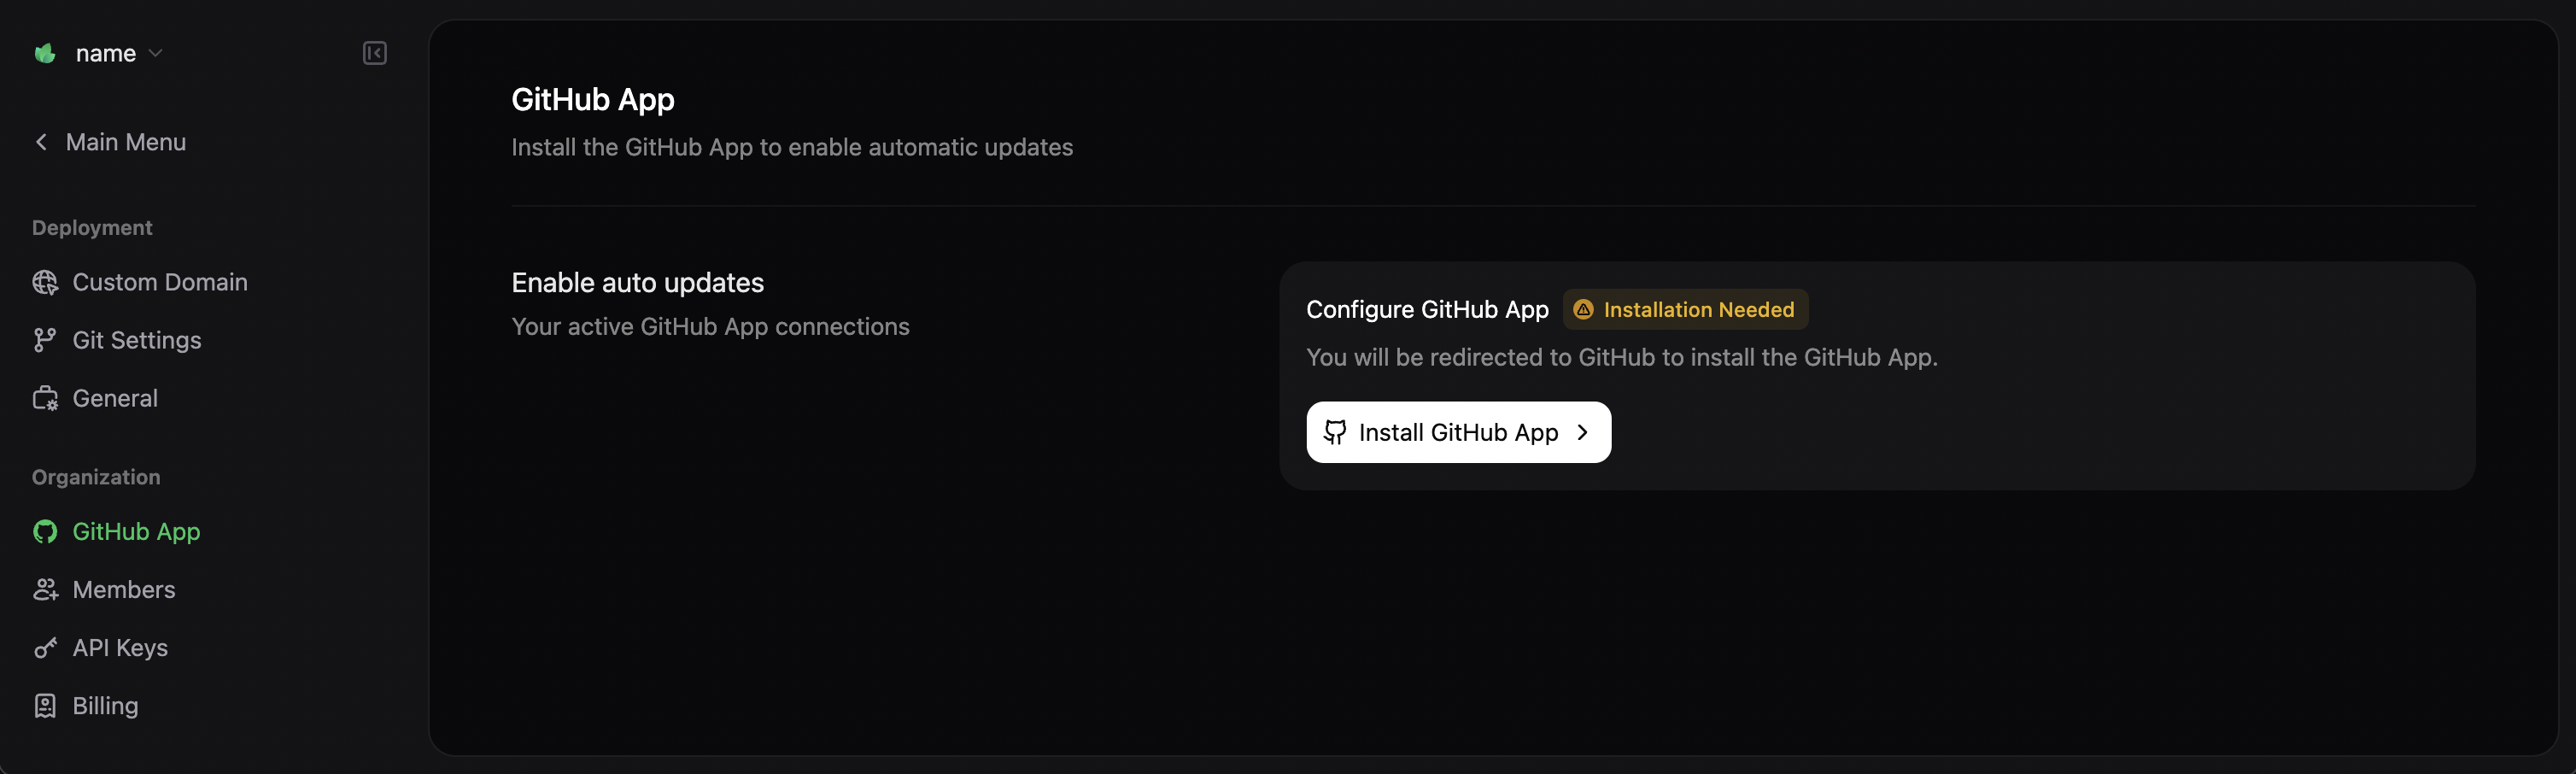
1. 在 Mintlify 控制台中前往 **Settings**。
2. 在侧边栏选择 **GitHub App**。
3. 点击 **Install GitHub App**。这将在新标签页中打开 GitHub 应用的安装页面。
4. 选择要安装该应用的组织或个人账户。
5. 选择你要连接的代码仓库。
<Frame>
  <img src="https://mintcdn.com/mintlify-mintlify-add-hello-world-quickstart-48843/jocJo5b89LRoeOR4/images/quickstart/github-app-installation-light.png?fit=max&auto=format&n=jocJo5b89LRoeOR4&q=85&s=8d7f9a910d8d067fe1f715987dc1b0c8" alt="GitHub App Installation" className="block dark:hidden" width="3024" height="910" data-path="images/quickstart/github-app-installation-light.png" />

  <img src="https://mintcdn.com/mintlify-mintlify-add-hello-world-quickstart-48843/jocJo5b89LRoeOR4/images/quickstart/github-app-installation-dark.png?fit=max&auto=format&n=jocJo5b89LRoeOR4&q=85&s=1f77a8bdd648e381cb25d7fb7d774a84" alt="GitHub App Installation" className="hidden dark:block" width="3016" height="906" data-path="images/quickstart/github-app-installation-dark.png" />
</Frame>

<Info>
  如果你将文档迁移到其他代码仓库，请更新 GitHub 应用的权限。
</Info>

<div id="authorize-your-github-account">
  ### 授权你的 GitHub 账号
</div>

1. 在 Mintlify 控制台进入 **Settings**。
2. 在侧边栏选择 **My Profile**。
3. 选择 **Authorize GitHub account**。这会在新标签页中打开 GitHub 授权页面。

<Info>
  根据你的组织设置，可能需要你所在 GitHub 组织的管理员为你的账号进行授权。
</Info>

<div id="editing-workflows">
  ## 编辑工作流
</div>

Mintlify 提供两种用于创建和维护文档的工作流：

<Card title="基于代码的工作流" icon="terminal" horizontal href="#code-based-workflow">
  适合在本地环境中配合现有工具的用户。点击跳转至本节。
</Card>

<Card title="网页编辑器工作流" icon="mouse-pointer-2" horizontal href="#web-editor-workflow">
  适合在浏览器中使用可视化界面的用户。点击跳转至本节。
</Card>

<div id="code-based-workflow">
  ## 基于代码的工作流
</div>

基于代码的工作流可与您现有的开发环境和 Git 仓库集成。此工作流最适合希望将文档与代码并行管理的技术团队。

<div id="install-the-cli">
  ### 安装命令行工具
</div>

要在本地编辑与维护文档，请在终端运行以下命令安装命令行工具（CLI）[mint](https://www.npmjs.com/package/mint)：

<CodeGroup>
  ```bash npm
  npm i -g mint
  ```

  ```bash pnpm
  pnpm add -g mint
  ```
</CodeGroup>

<Info>
  需要先在本机安装 Node.js。若遇到安装问题，请查看故障排查指南。
</Info>

<div id="edit-the-documentation">
  ### 编辑文档
</div>

完成环境配置后，你就可以开始编辑文档文件了。例如，更新介绍页的标题：

1. 打开你在入门引导过程中创建的代码仓库。
2. 打开 `index.mdx`，定位到文件顶部：

```mdx index.mdx
---
title: "介绍"
description: "这是文档的介绍"
---
```

3. 将 `title` 字段改为 `"Hello World"`。

```mdx index.mdx {2}
---
title: "Hello World"
description: "这是文档的简介"
---
```

<div id="preview-the-changes">
  ### 预览更改
</div>

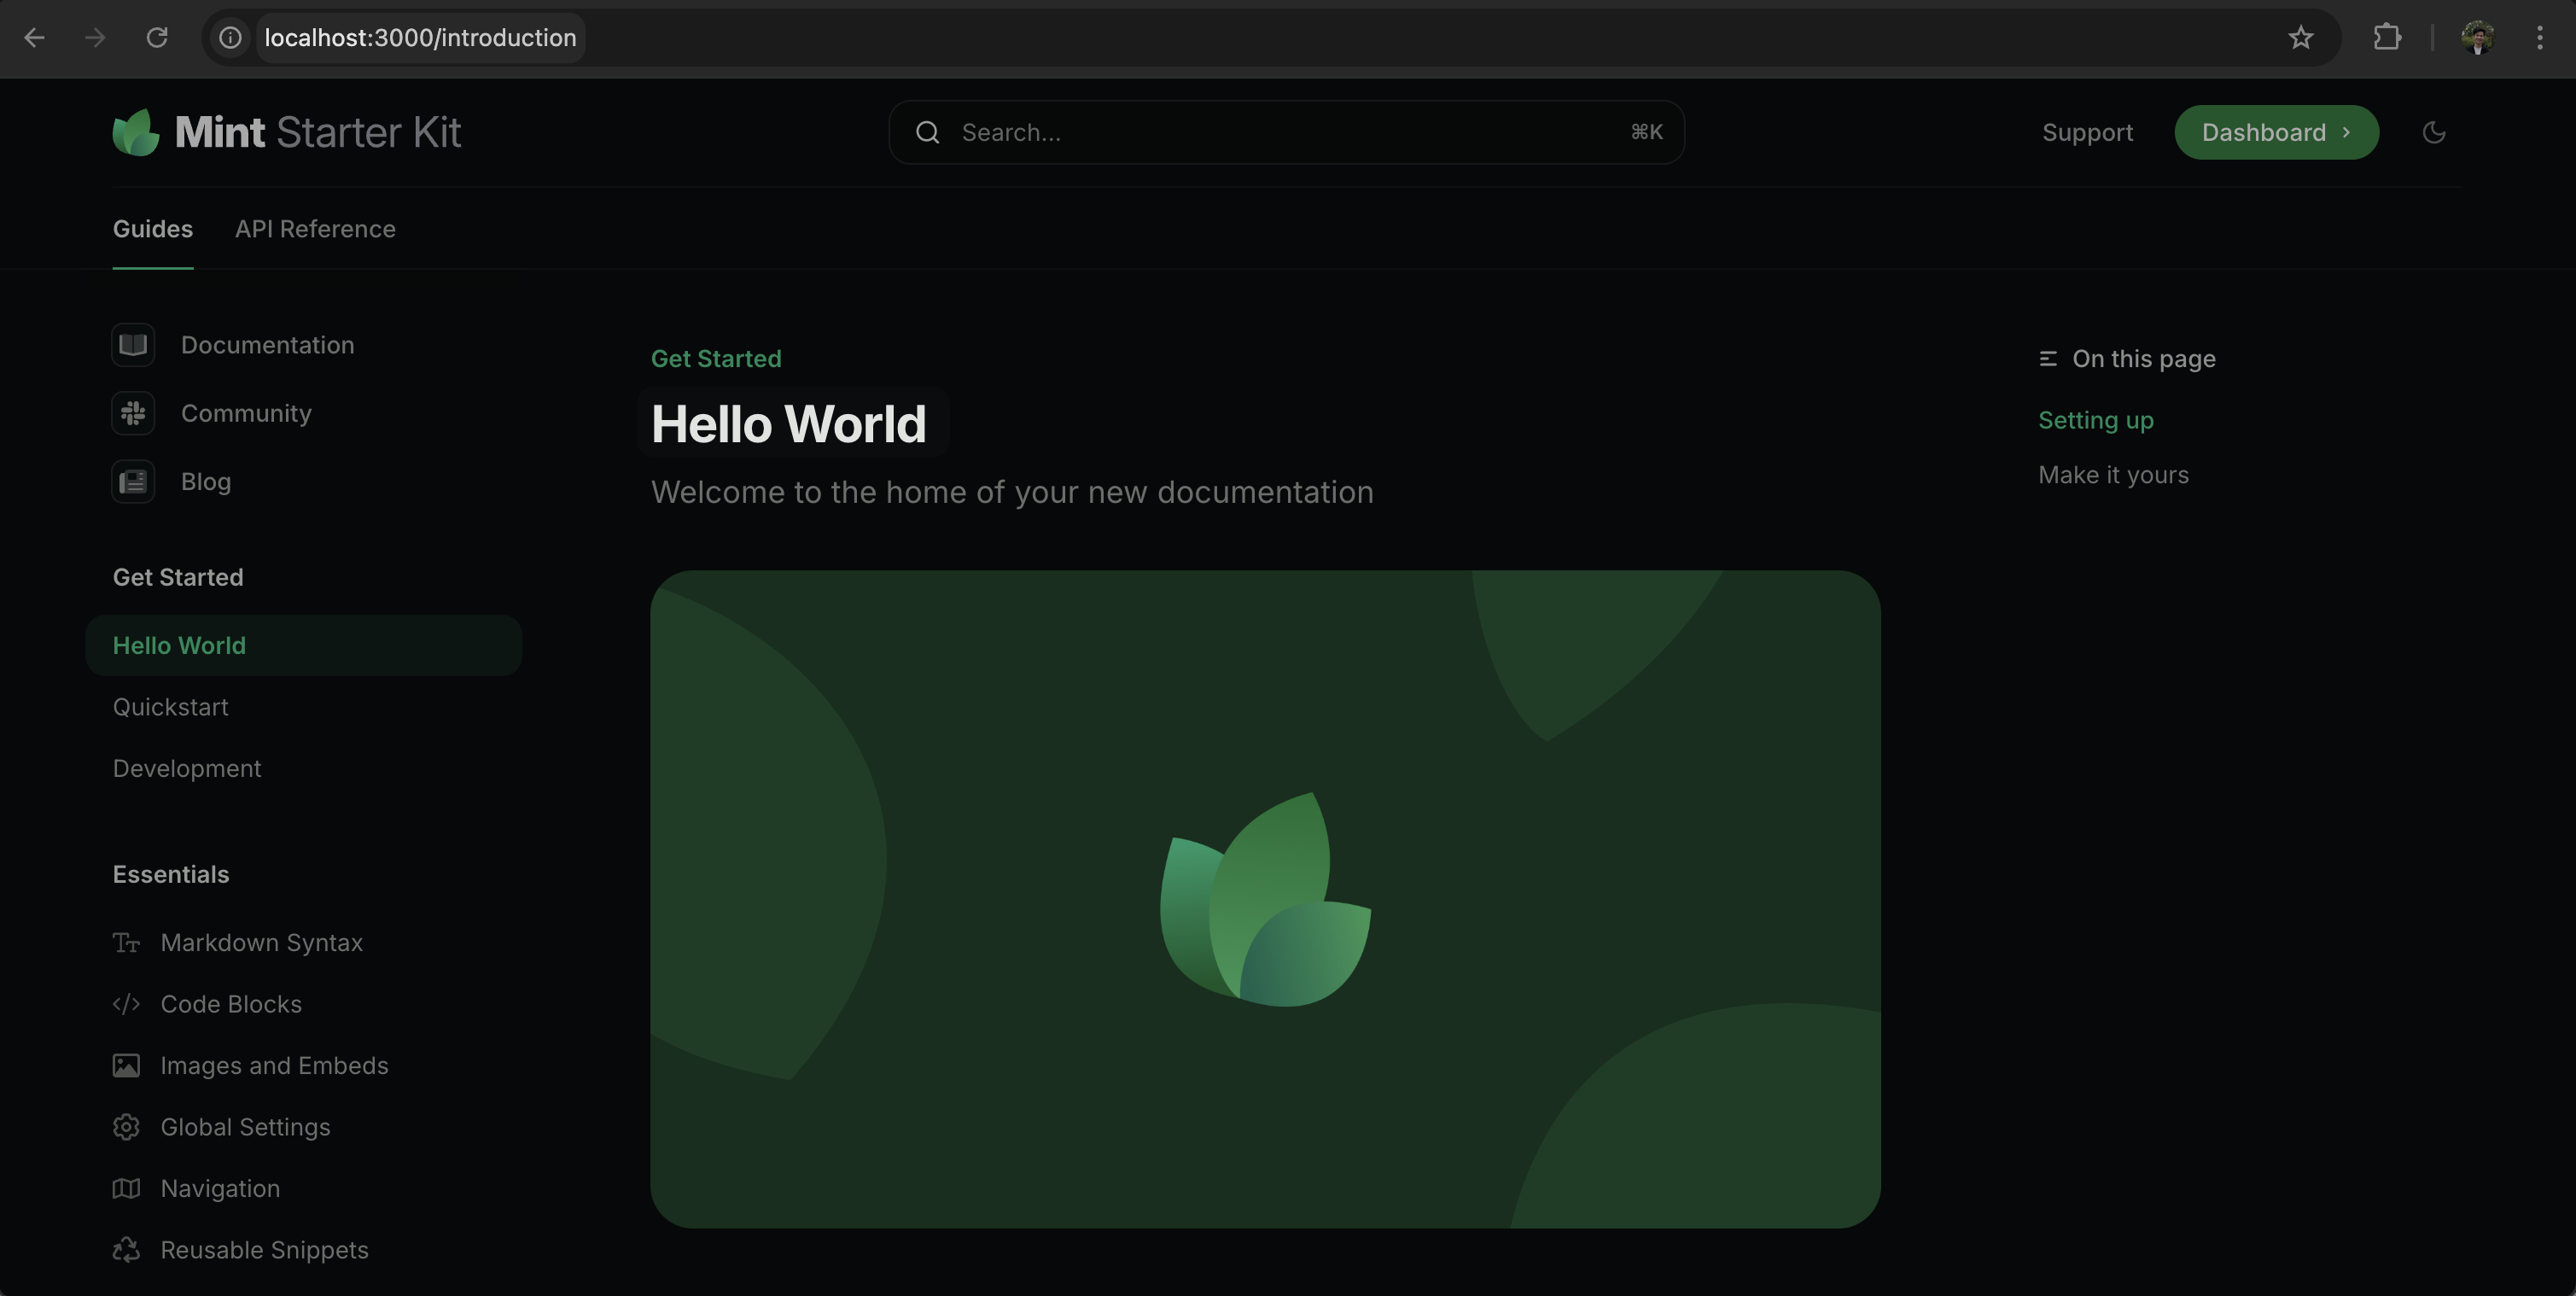
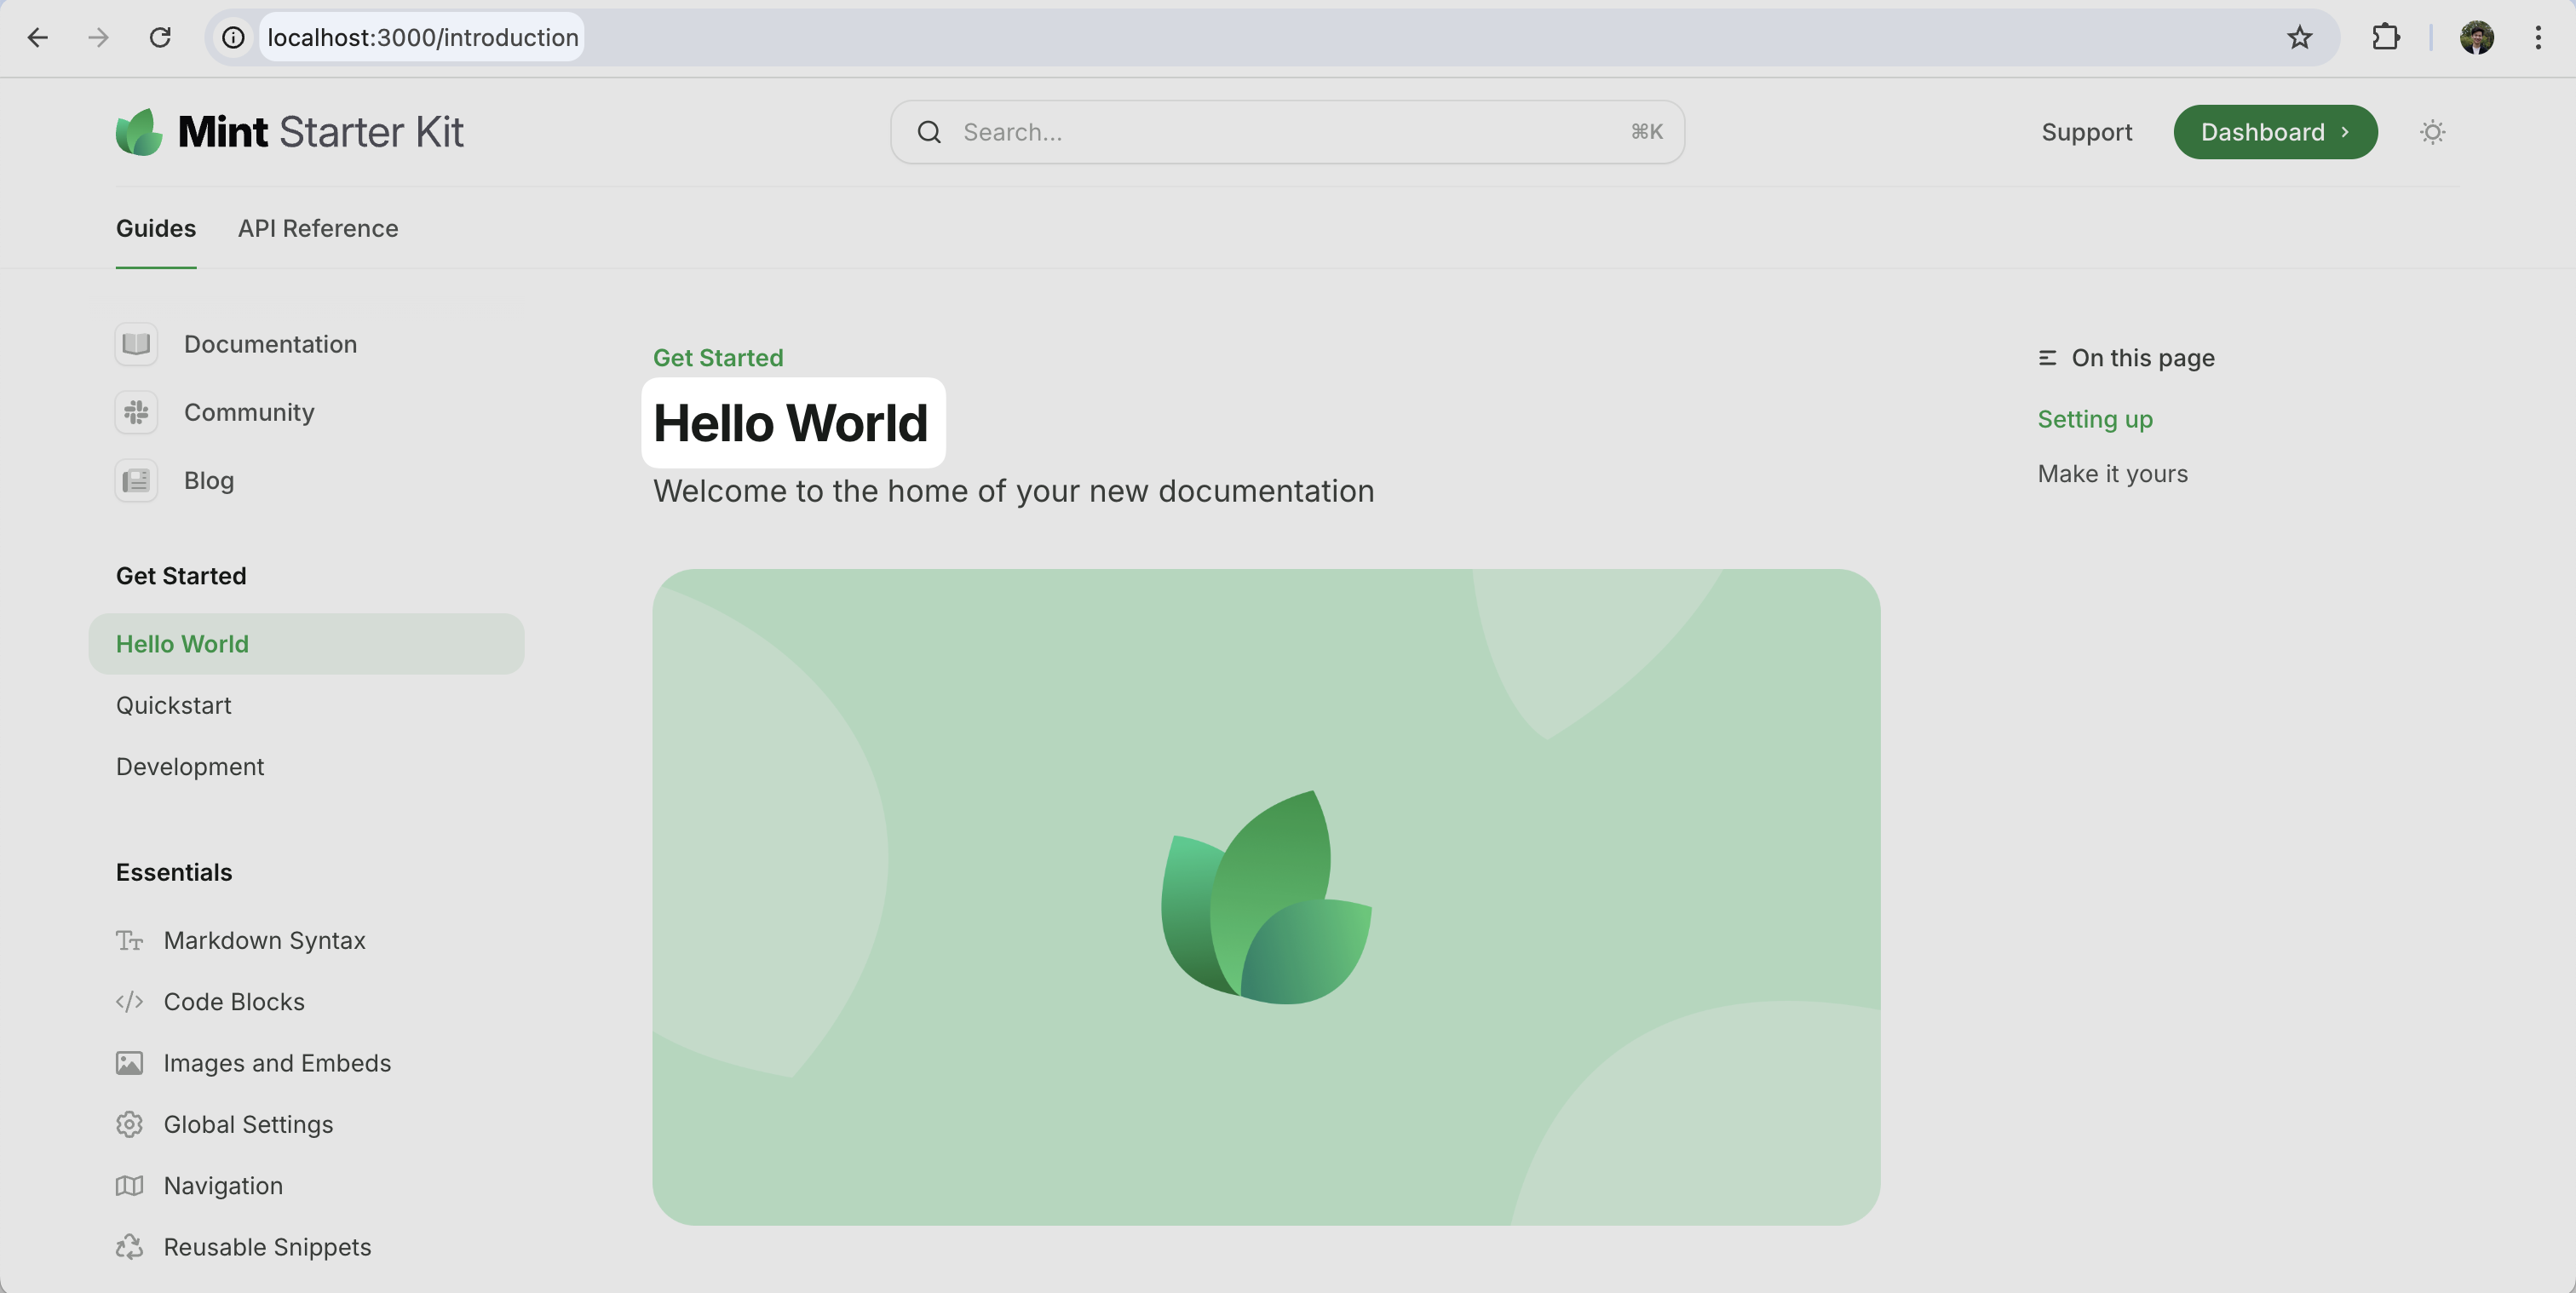
要在本地预览更改，请运行以下命令：

```bash
mint dev
```

你的预览可在 `localhost:3000` 查看。
<Frame>
  <img src="https://mintcdn.com/mintlify-mintlify-add-hello-world-quickstart-48843/jocJo5b89LRoeOR4/images/quickstart/mintlify-dev-light.png?fit=max&auto=format&n=jocJo5b89LRoeOR4&q=85&s=e8e2771bcf13a570f870d31d044ef6ec" alt="Mintlify Dev" className="block dark:hidden" width="3024" height="1518" data-path="images/quickstart/mintlify-dev-light.png" />

  <img src="https://mintcdn.com/mintlify-mintlify-add-hello-world-quickstart-48843/jocJo5b89LRoeOR4/images/quickstart/mintlify-dev-dark.png?fit=max&auto=format&n=jocJo5b89LRoeOR4&q=85&s=0005a7c5a03f1ea989522e74e20cbed1" alt="Mintlify Dev" className="hidden dark:block" width="3018" height="1518" data-path="images/quickstart/mintlify-dev-dark.png" />
</Frame>

<div id="push-the-changes">
  ### 推送更改
</div>

当你准备发布更改时，将其推送到你的代码仓库。

Mintlify 会自动检测更改、构建文档，并将更新部署到你的网站。你可以在 GitHub 仓库的提交历史或 [控制台](https://dashboard.mintlify.com) 中查看部署状态。

部署完成后，你的最新更新将可通过 `<your-project-name>.mintlify.app` 访问。

<Card title="跳转到添加自定义域名" icon="arrow-down" href="#adding-a-custom-domain" horizontal>
  你也可以跳过网页编辑器流程，直接前往添加自定义域名。
</Card>

<div id="web-editor-workflow">
  ## 网页编辑器工作流
</div>

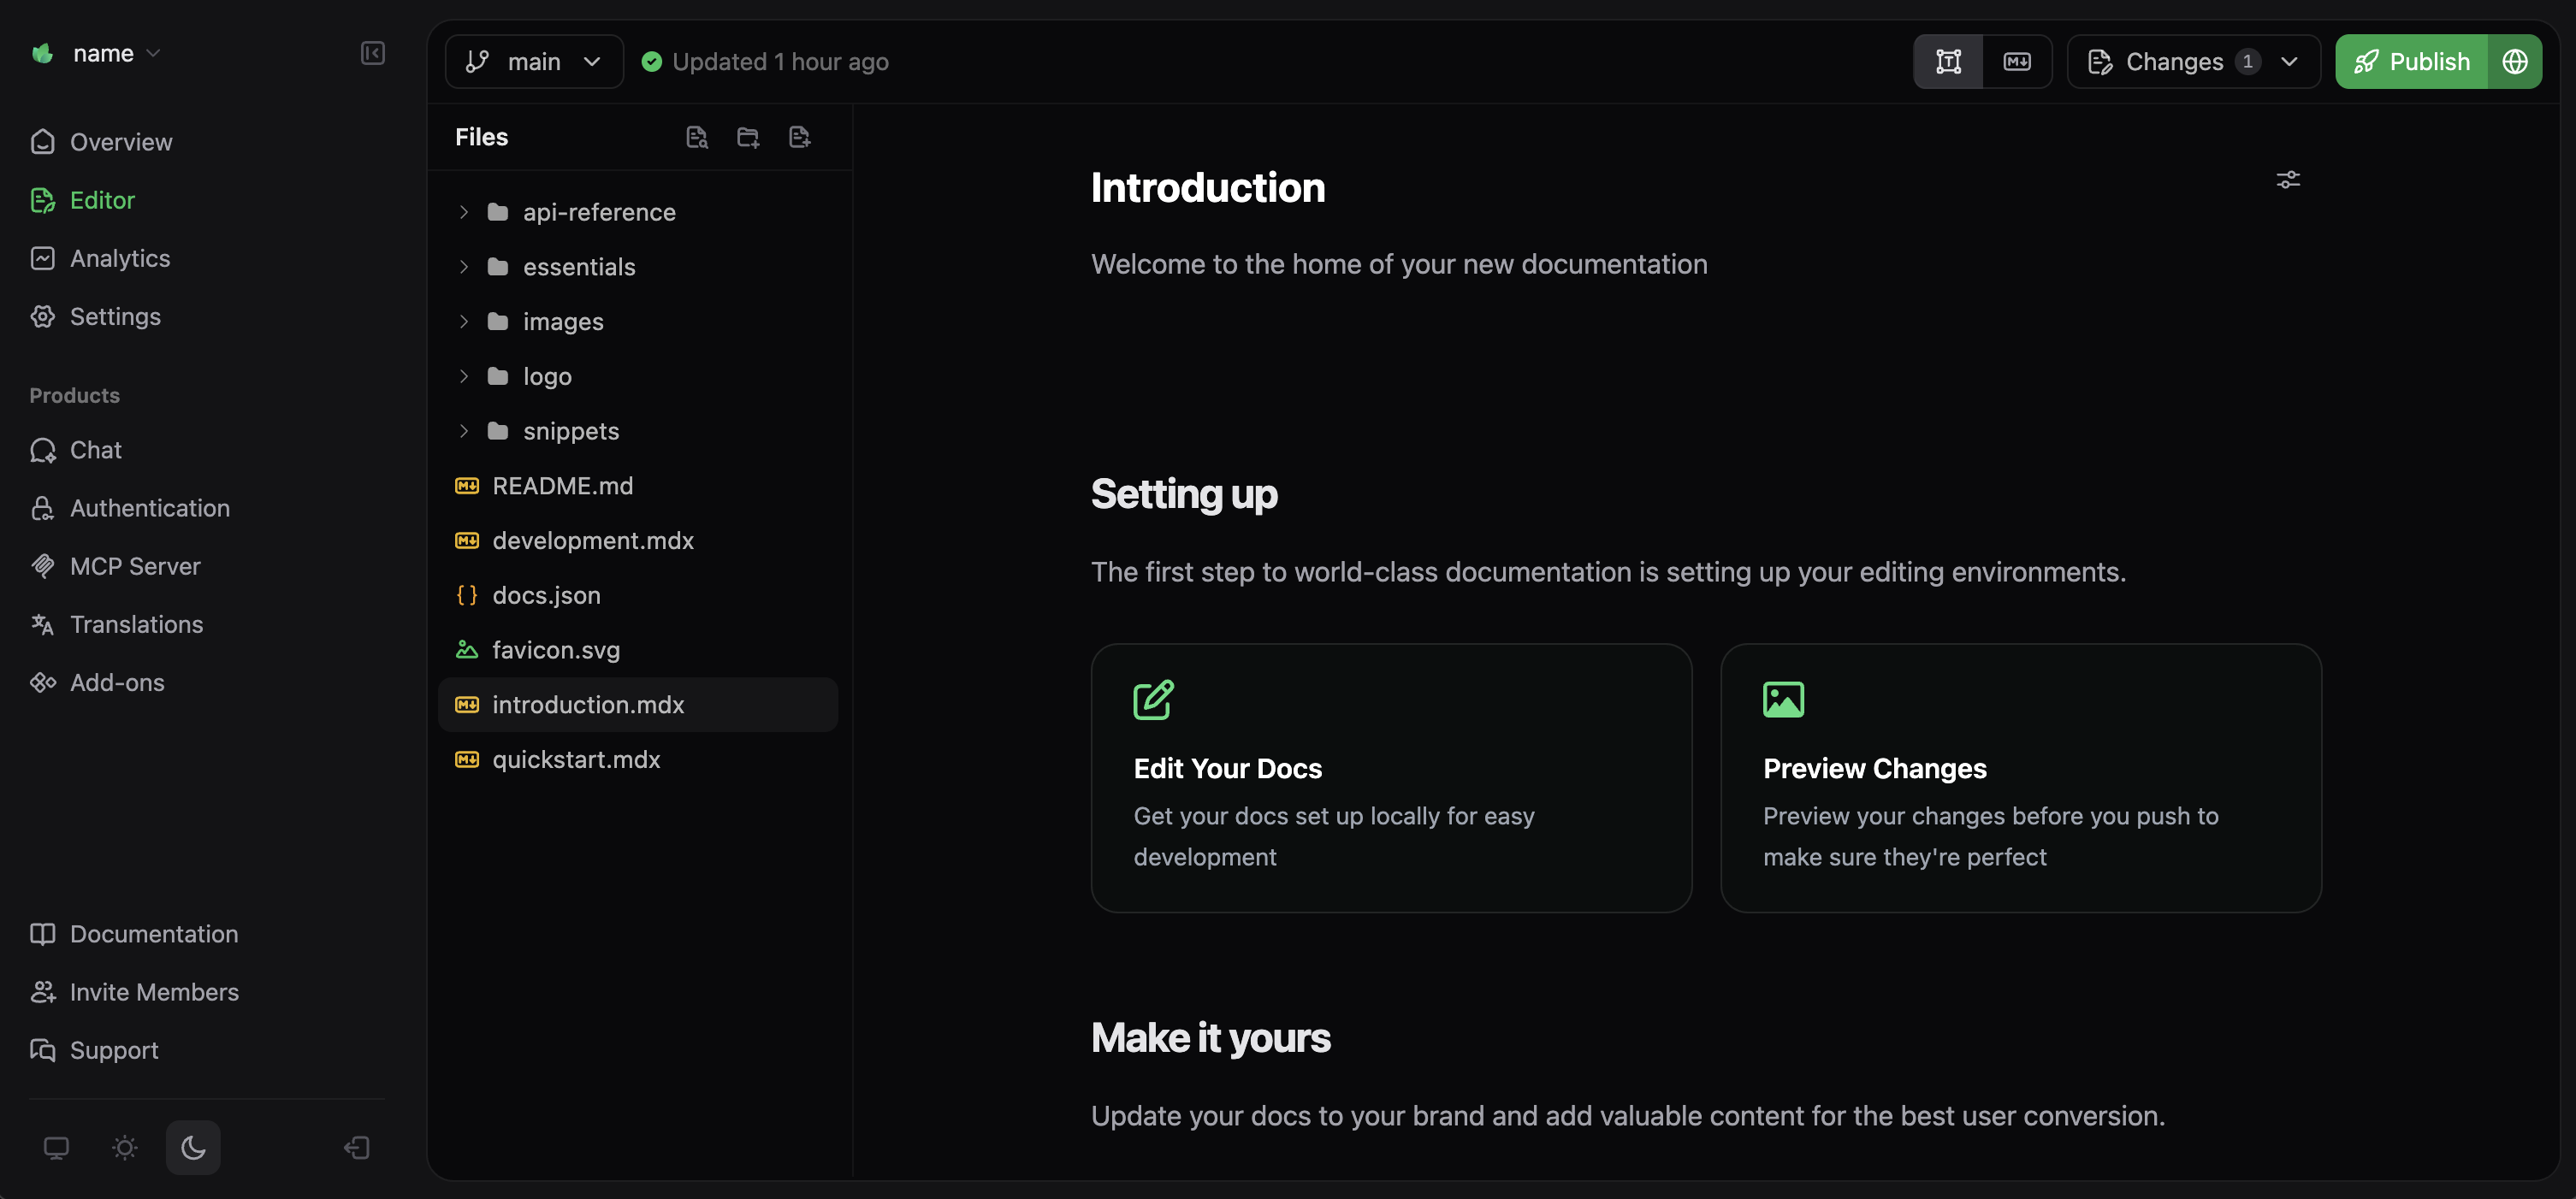
网页编辑器工作流提供所见即所得（WYSIWYG）界面，用于创建和编辑文档。该工作流最适合希望直接在浏览器中工作、且无需额外本地开发工具的用户。

<div id="access-the-web-editor">
  ### 访问网页编辑器
</div>

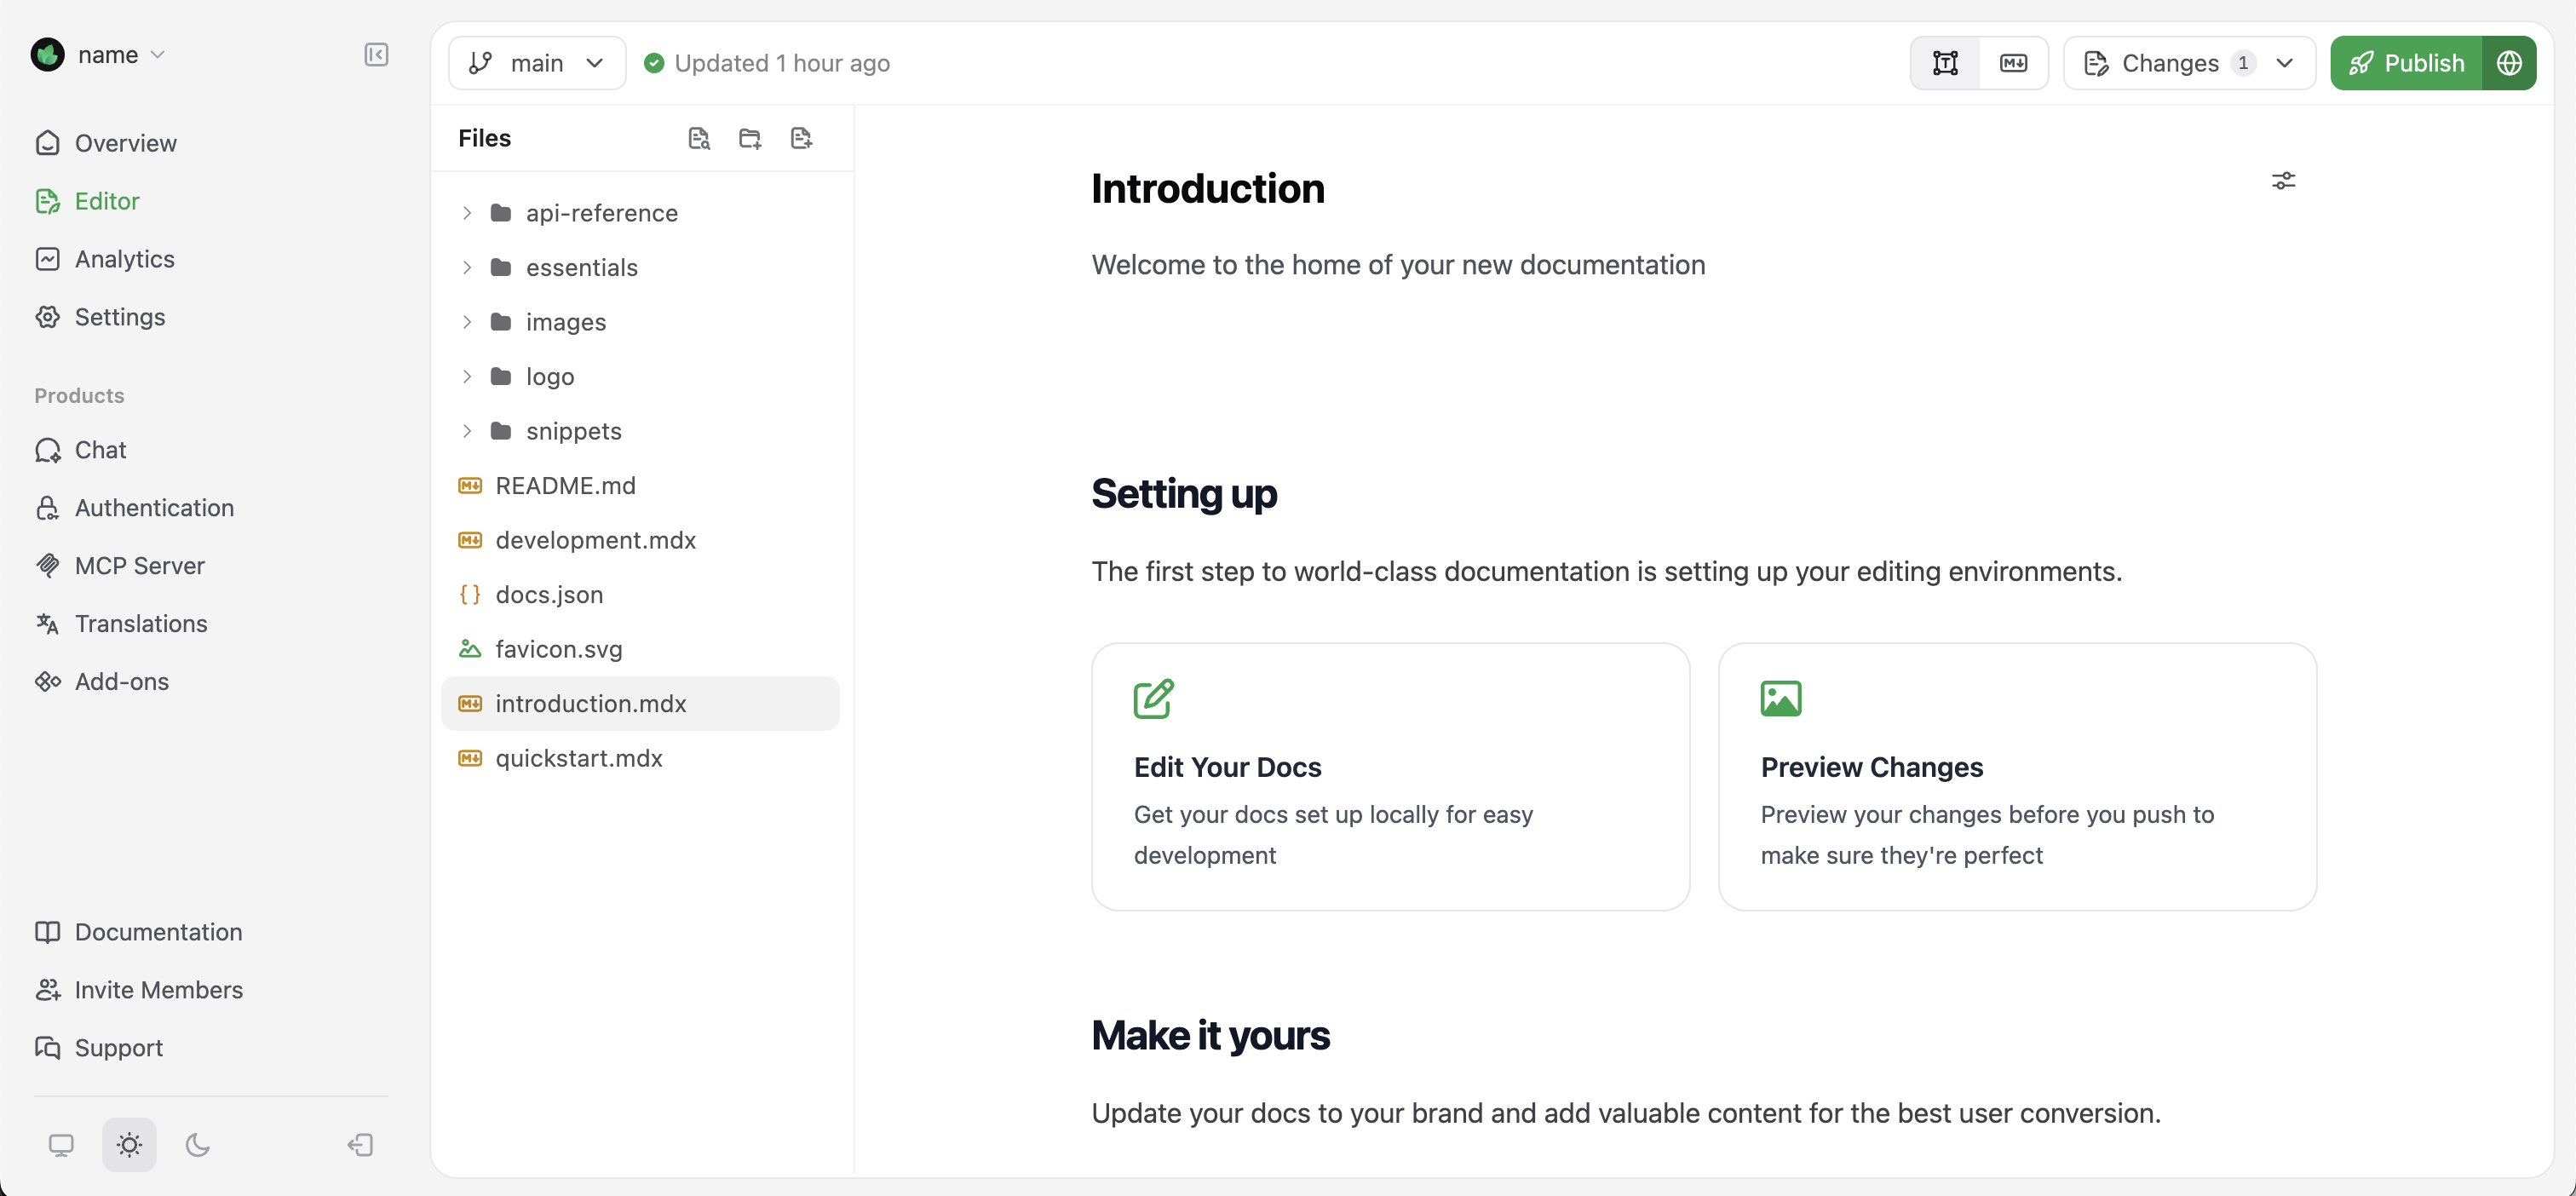
1. 登录你的[仪表盘](https://dashboard.mintlify.com)。
2. 在左侧边栏选择**Editor**。
<Info>
  如果你尚未安装 GitHub 应用，打开网页编辑器时会提示你进行安装。
</Info>

<Frame>
  <img alt="Mintlify 网页编辑器的可视化编辑模式" src="https://mintcdn.com/mintlify-mintlify-add-hello-world-quickstart-48843/jocJo5b89LRoeOR4/images/quickstart/web-editor-light.png?fit=max&auto=format&n=jocJo5b89LRoeOR4&q=85&s=ae25205da722d9952583e3850f4f4b6b" className="block dark:hidden" width="3024" height="1404" data-path="images/quickstart/web-editor-light.png" />

  <img alt="Mintlify 网页编辑器的可视化编辑模式" src="https://mintcdn.com/mintlify-mintlify-add-hello-world-quickstart-48843/jocJo5b89LRoeOR4/images/quickstart/web-editor-dark.png?fit=max&auto=format&n=jocJo5b89LRoeOR4&q=85&s=9ca4ad3646a78428d91b70cdd83d1c69" className="hidden dark:block" width="3011" height="1402" data-path="images/quickstart/web-editor-dark.png" />
</Frame>

<div id="edit-the-documentation">
  ### 编辑文档
</div>

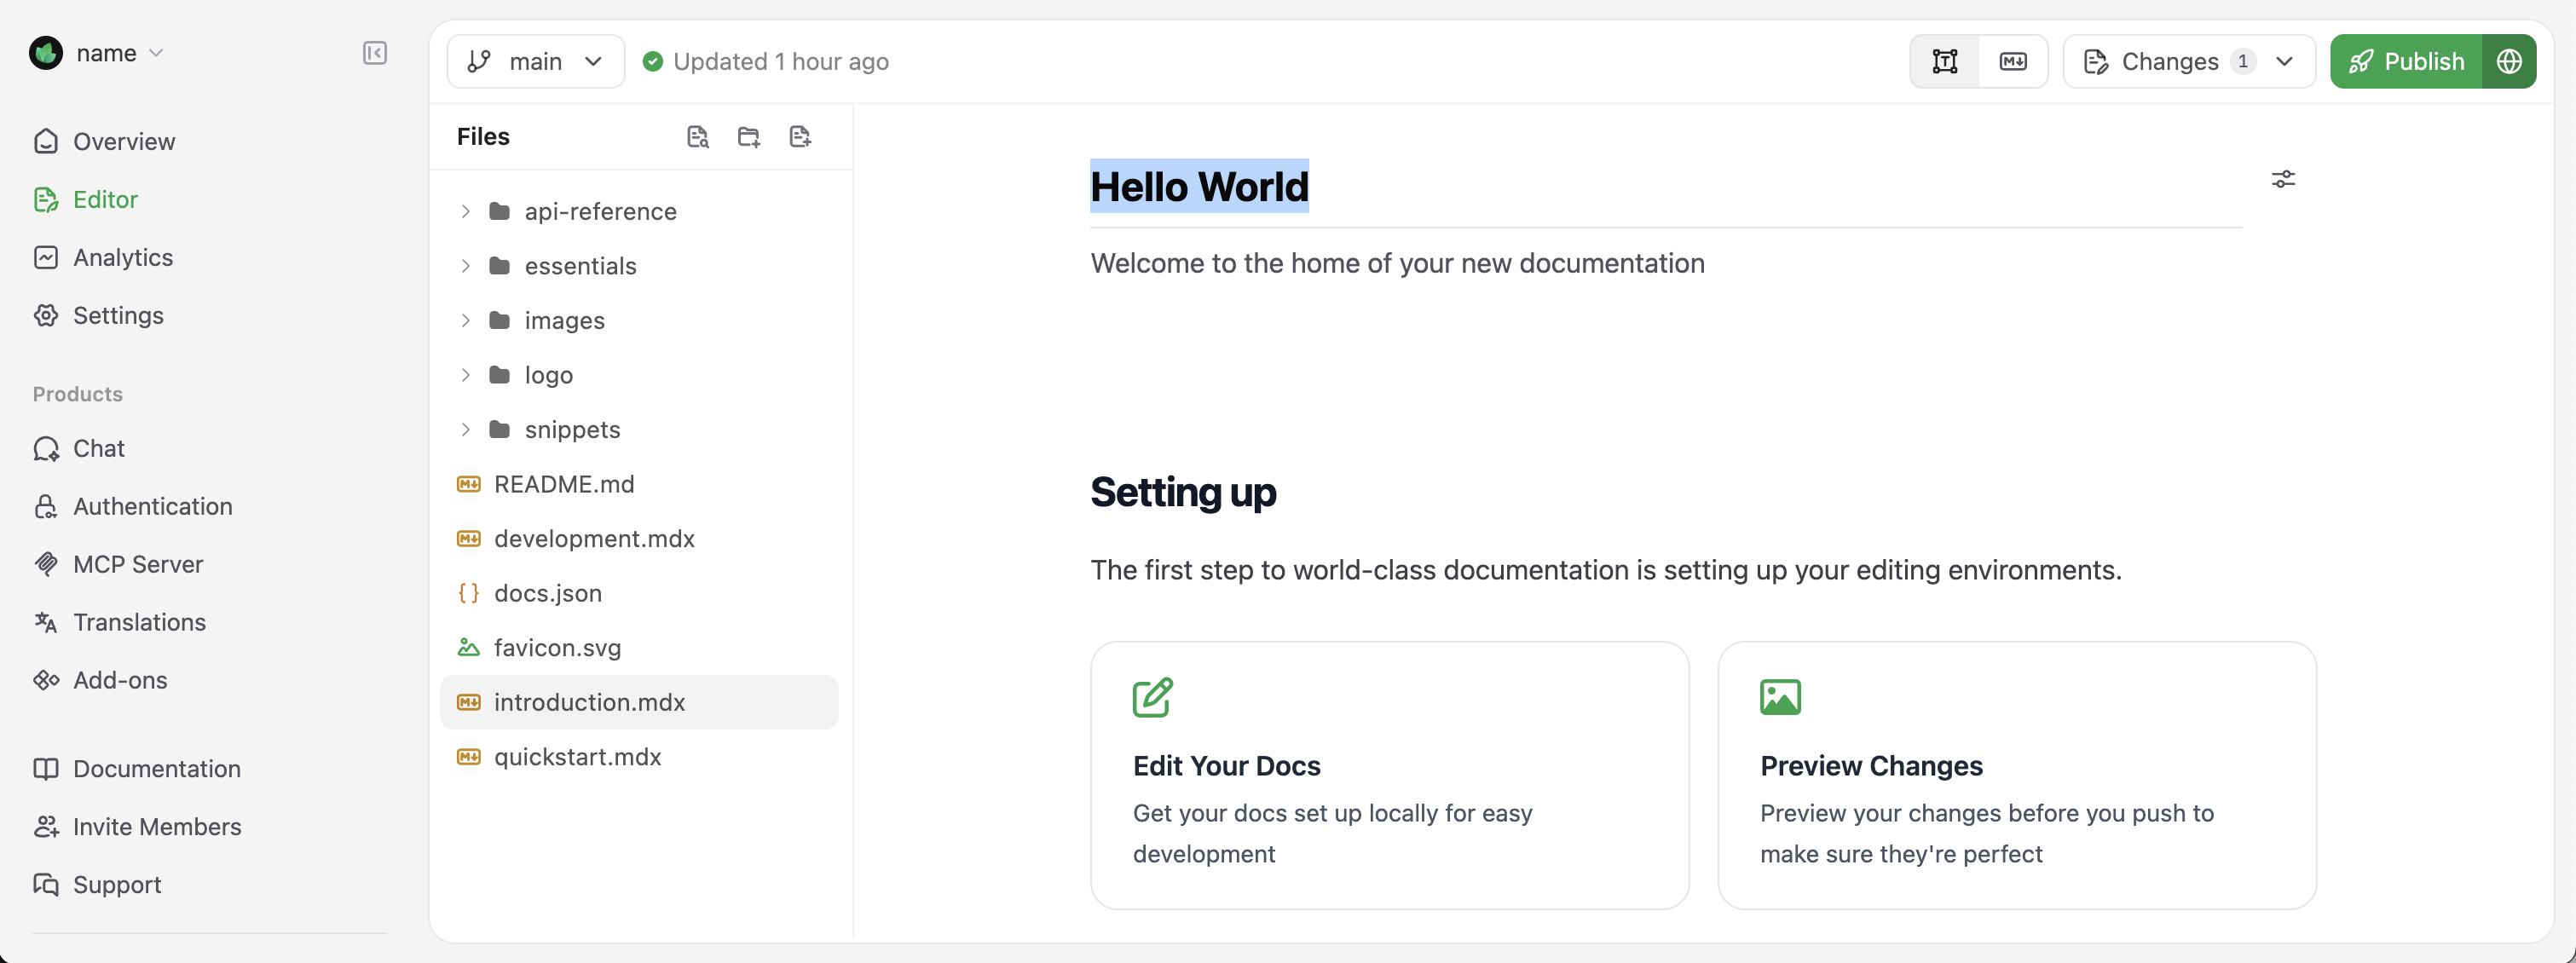
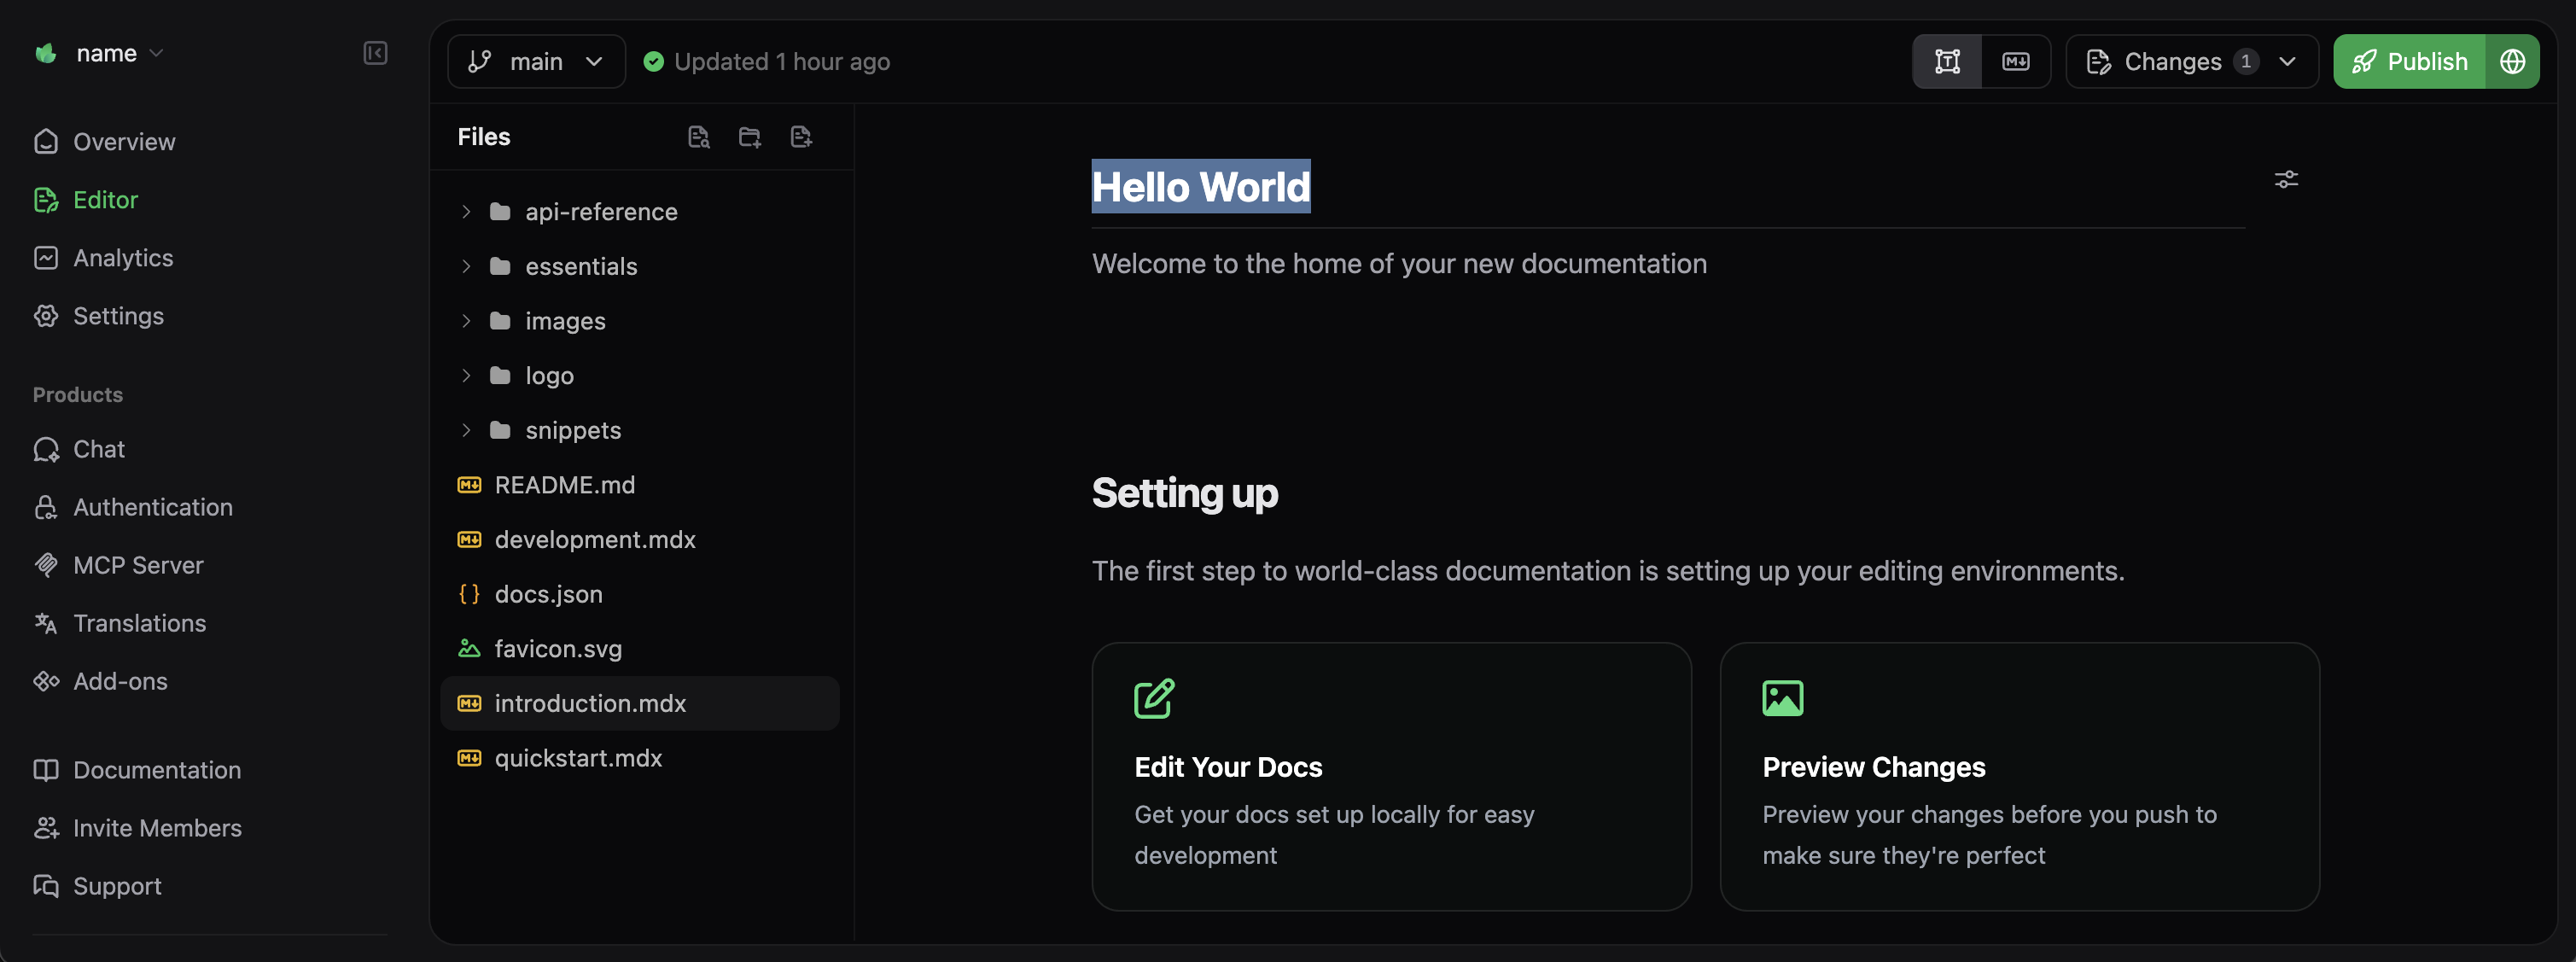
在网页编辑器中，你可以通过侧边栏浏览文档文件。让我们来更新简介页面：

在文件资源管理器中找到并选择 `index.mdx`。

然后在编辑器中，将标题字段更新为“Hello World”。

<Frame>
  <img alt="Editing in Web Editor" src="https://mintcdn.com/mintlify-mintlify-add-hello-world-quickstart-48843/jocJo5b89LRoeOR4/images/quickstart/web-editor-editing-light.png?fit=max&auto=format&n=jocJo5b89LRoeOR4&q=85&s=be273242be5a7f0a4268de917198f2d5" className="block dark:hidden" width="3022" height="1130" data-path="images/quickstart/web-editor-editing-light.png" />

  <img alt="Editing in Web Editor" src="https://mintcdn.com/mintlify-mintlify-add-hello-world-quickstart-48843/jocJo5b89LRoeOR4/images/quickstart/web-editor-editing-dark.png?fit=max&auto=format&n=jocJo5b89LRoeOR4&q=85&s=a59c0e47fcfe65ef82735c8aa59f6169" className="hidden dark:block" width="3018" height="1127" data-path="images/quickstart/web-editor-editing-dark.png" />
</Frame>

<Tip>
  编辑器提供了丰富的格式化工具和组件。在编辑器中输入 <kbd>/</kbd> 以打开命令菜单并访问这些工具。
</Tip>

<div id="publish-your-changes">
  ### 发布更改
</div>

当你对编辑内容满意时，点击右上角的 **Publish** 按钮。你的更改会立即部署到文档站点。

<Tip>
  使用分支配合拉取请求，在部署到正式站点之前进行预览和审阅。
</Tip>

有关使用网页编辑器的更多说明，包括如何通过分支和拉取请求进行协作与预览更改，请参阅我们的[网页编辑器文档](/zh/editor/getting-started)。

<div id="adding-a-custom-domain">
  ## 添加自定义域名
</div>

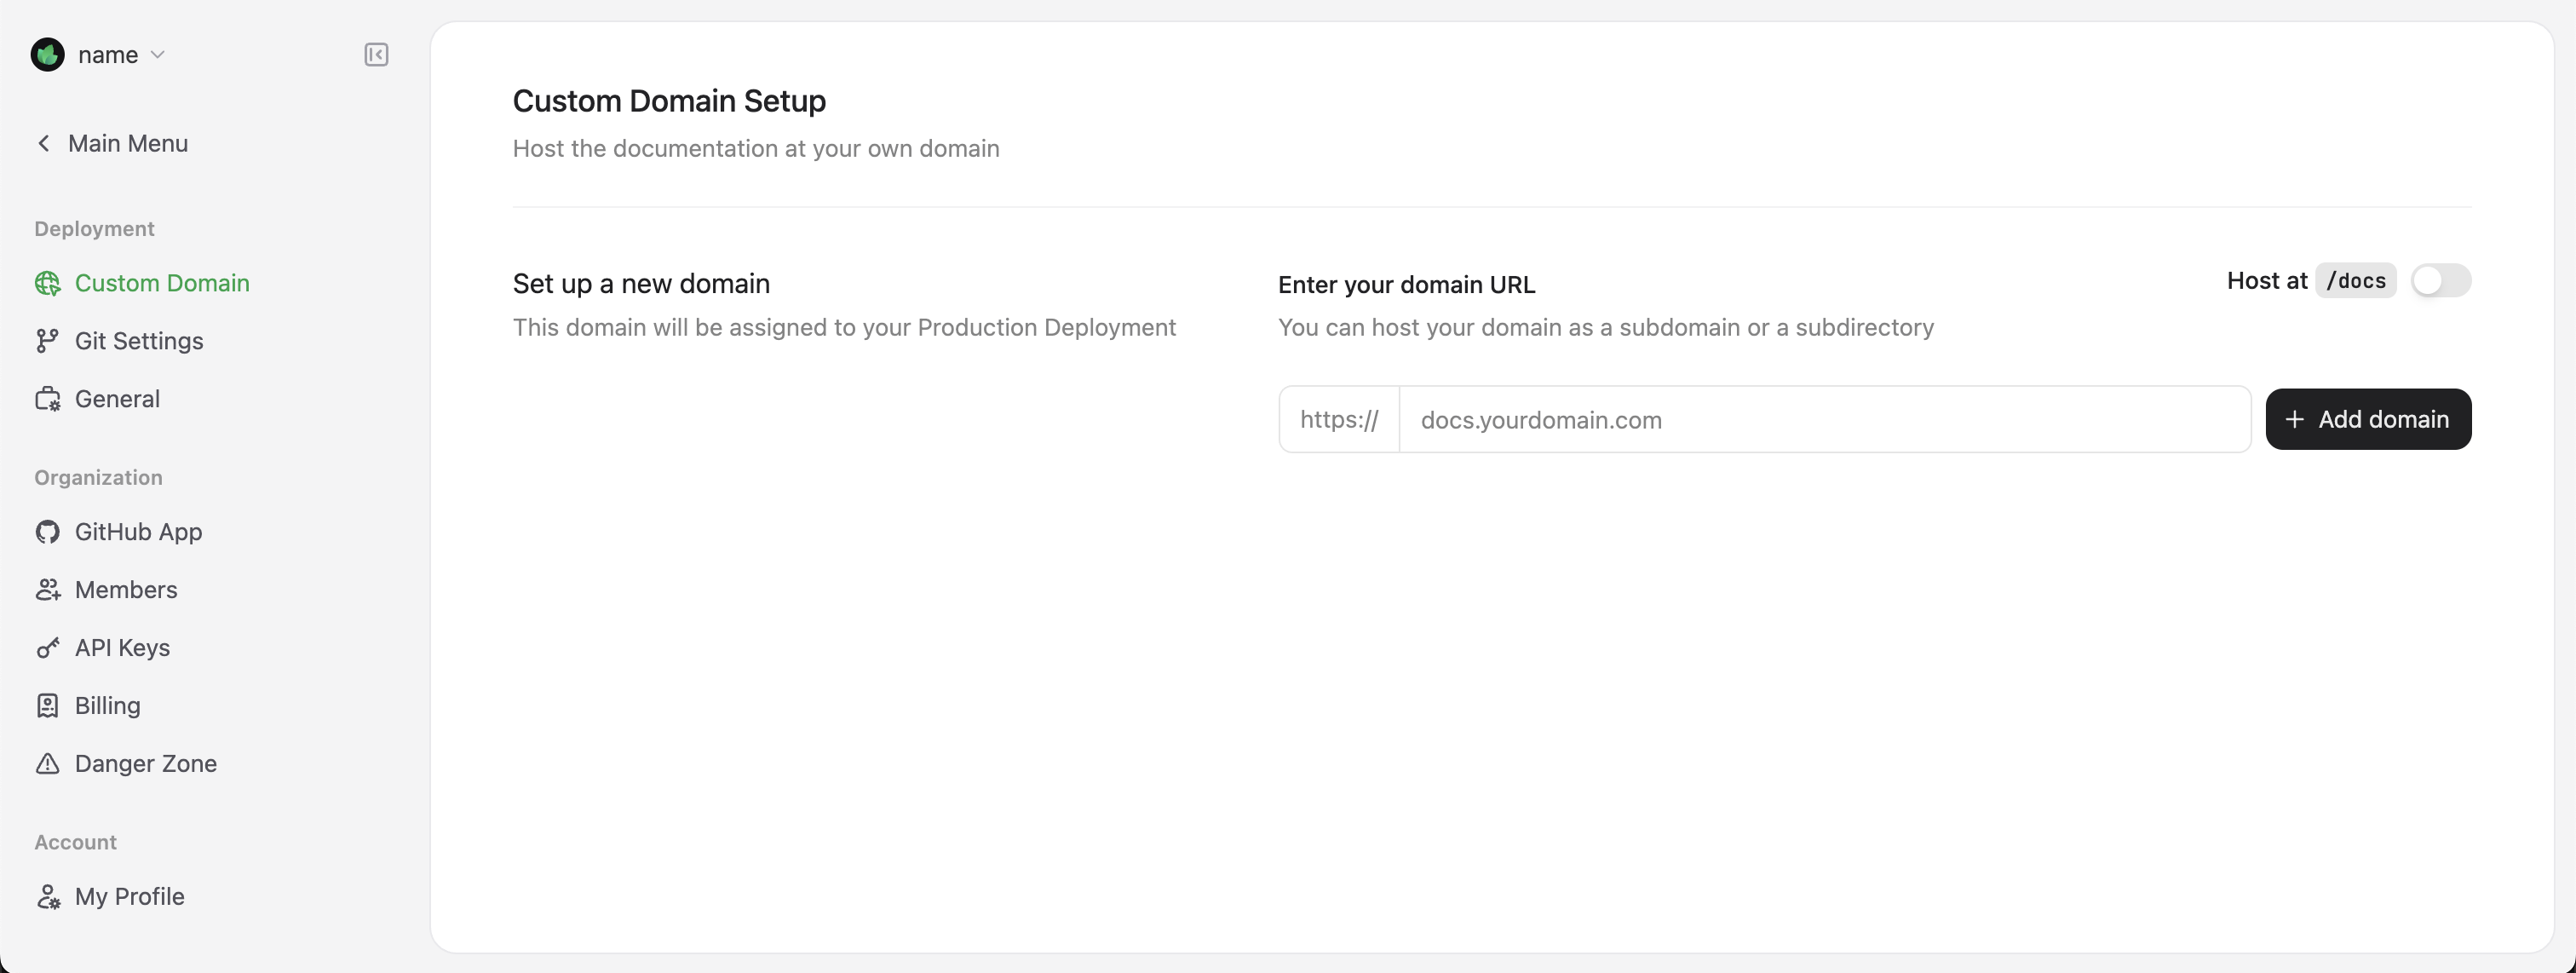
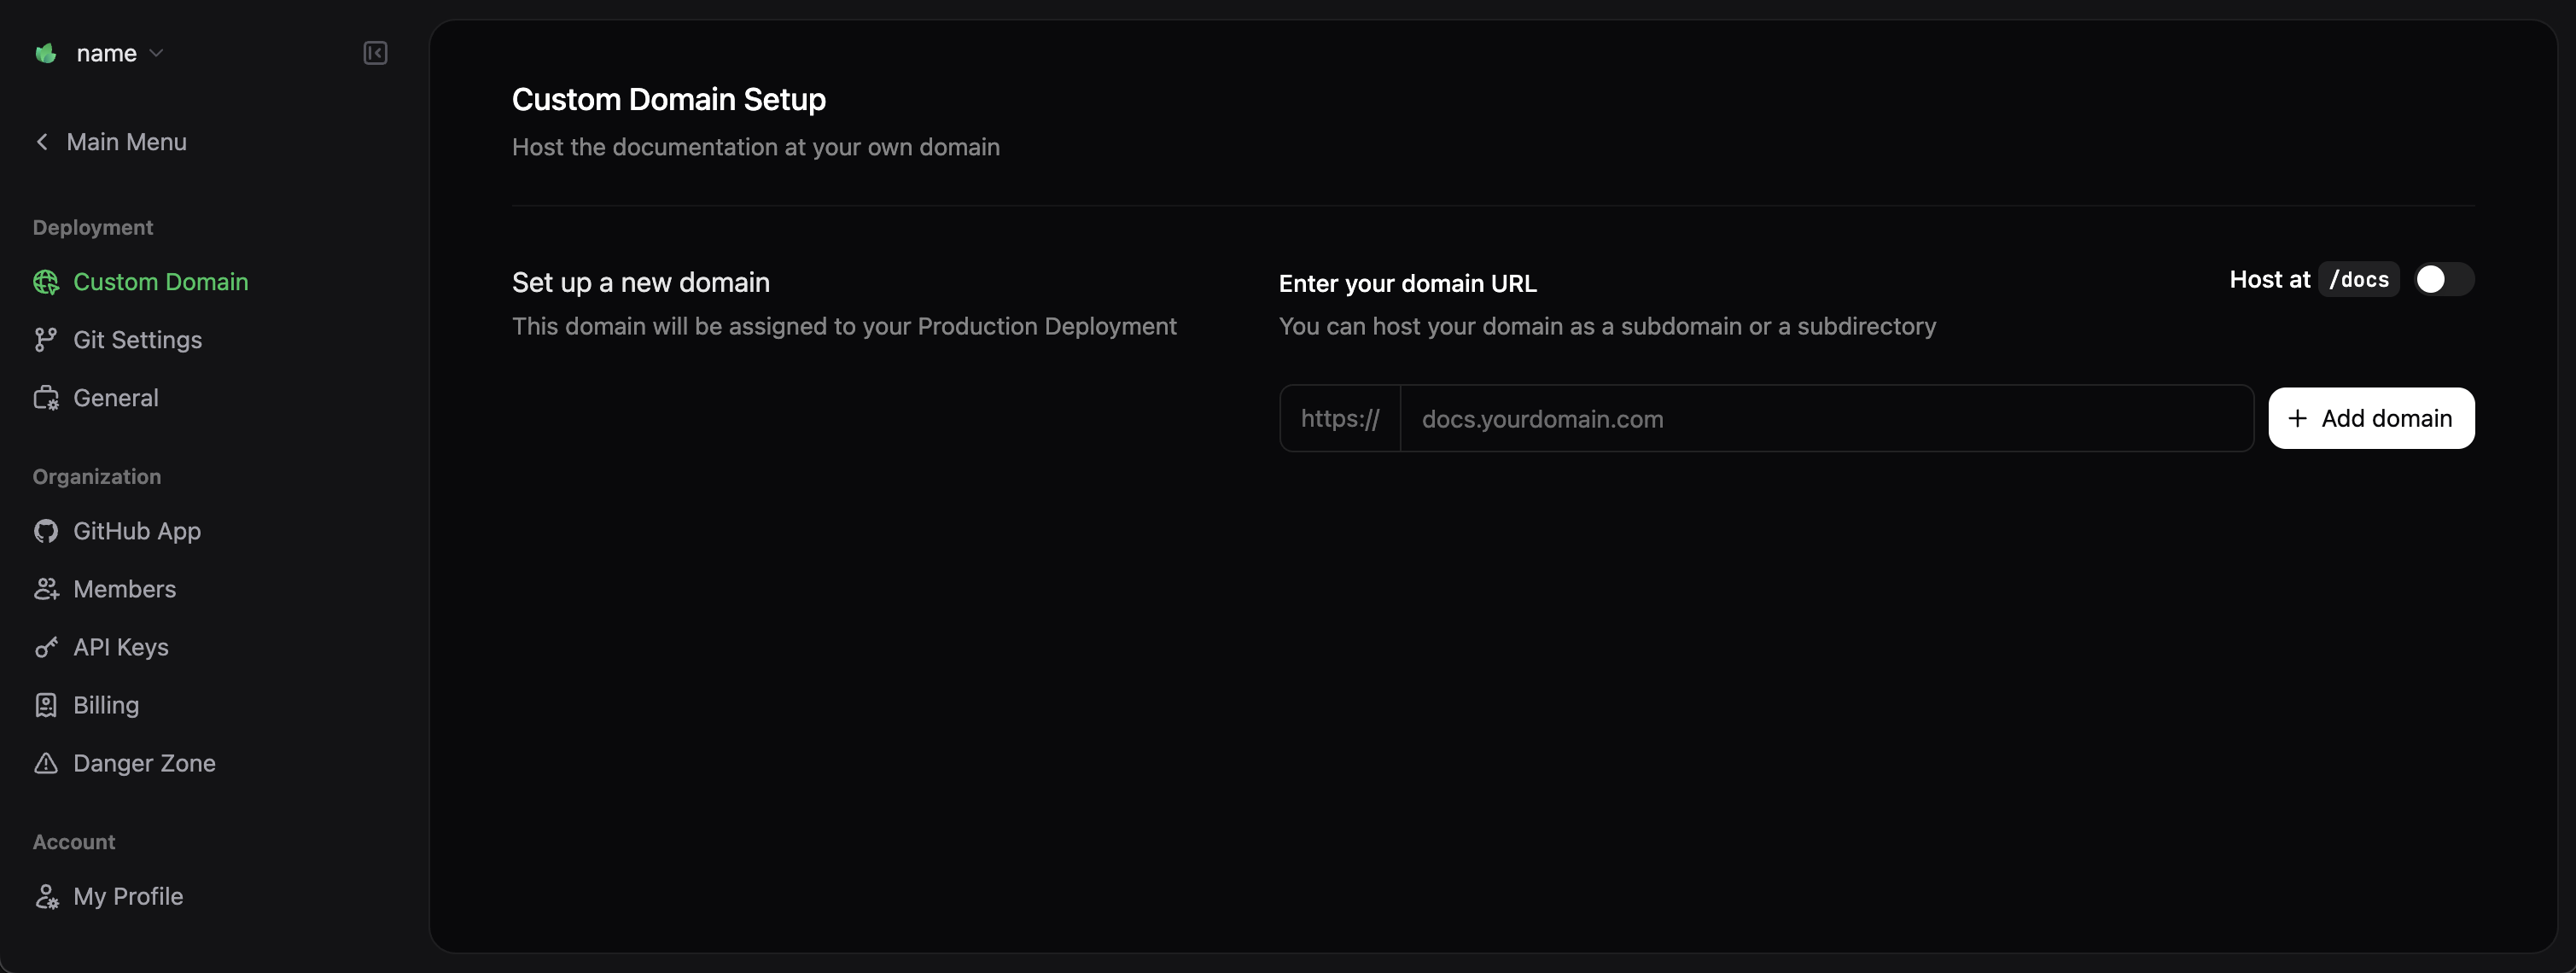
虽然 `<your-project-name>.mintlify.app` 子域名非常适合测试和开发，但大多数团队更倾向在生产环境的文档中使用自定义域名。

要添加自定义域名，请在控制台前往 [Domain Setup](https://dashboard.mintlify.com/settings/deployment/custom-domain) 页面。

<Frame>
  <img src="https://mintcdn.com/mintlify-mintlify-add-hello-world-quickstart-48843/jocJo5b89LRoeOR4/images/quickstart/custom-domain-light.png?fit=max&auto=format&n=jocJo5b89LRoeOR4&q=85&s=3574e63a78c8d085c1071795d5c4f009" alt="Custom Domain" className="block dark:hidden" width="3024" height="1142" data-path="images/quickstart/custom-domain-light.png" />

  <img src="https://mintcdn.com/mintlify-mintlify-add-hello-world-quickstart-48843/jocJo5b89LRoeOR4/images/quickstart/custom-domain-dark.png?fit=max&auto=format&n=jocJo5b89LRoeOR4&q=85&s=637c0db4c910f93eaae4100cb47fc365" alt="Custom Domain" className="hidden dark:block" width="3018" height="1140" data-path="images/quickstart/custom-domain-dark.png" />
</Frame>

输入你的域名（例如 `docs.yourcompany.com`），并按照页面提示在你的域名服务商处配置 DNS 记录。

<Table>
  | 记录类型  | 名称         | 值                  | TTL  |
  | ----- | ---------- | ------------------ | ---- |
  | CNAME | docs（或子域名） | cname.mintlify.app | 3600 |
</Table>

<Info>
  DNS 变更的生效传播可能需要最长 48 小时，但通常会更快完成。
</Info>

<div id="next-steps">
  ## 后续步骤
</div>

恭喜！你已成功使用 Mintlify 部署文档站点。以下是提升文档的建议下一步：

<Card title="配置全局设置" icon="settings" href="zh/settings" horizontal>
  使用 `docs.json` 文档配置文件设置站点级样式、导航、集成等。
</Card>

<Card title="自定义主题" icon="paintbrush" href="zh/themes" horizontal>
  了解如何自定义颜色、字体和站点的整体外观。
</Card>

<Card title="组织导航" icon="map" href="zh/navigation" horizontal>
  通过清晰直观的导航构建文档结构，帮助用户快速找到所需内容。
</Card>

<Card title="添加交互组件" icon="puzzle" href="/zh/components/accordions" horizontal>
  使用手风琴、选项卡和代码示例等交互组件增强文档体验。
</Card>

<Card title="设置 API 参考" icon="code" href="/zh/api-playground/overview" horizontal>
  基于 OpenAPI规范 和 AsyncAPI规范 创建交互式 API 参考。
</Card>

<div id="troubleshooting">
  ## 故障排查
</div>

如果你在设置过程中遇到问题，请参考以下常见的故障排查方案：

<AccordionGroup>
  <Accordion title="本地预览无法运行">
    请确保已安装 Node.js v19+，并在包含 `docs.json` 文件的目录下运行 `mint dev` 命令。
  </Accordion>

  <Accordion title="变更未在线上站点生效">
    部署可能需要几分钟。请检查你的 GitHub Actions（基于代码的工作流）或在 Mintlify 控制台查看部署日志，确认没有构建错误。
  </Accordion>

  <Accordion title="自定义域名未成功连接">
    请确认 DNS 记录配置正确，并预留足够时间等待 DNS 传播（最长可达 48 小时）。你可以使用 [DNSChecker](https://dnschecker.org) 等工具验证 CNAME 记录。
  </Accordion>
</AccordionGroup>